
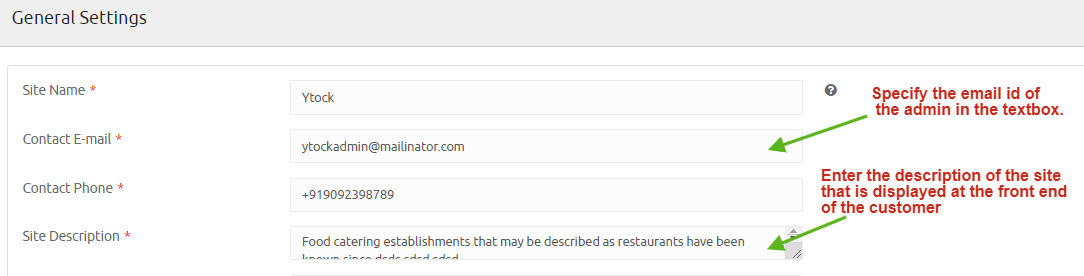
Customize your Ytock domain by entering your restaurant site name in the site name textbox.
Specify the admin email id in the contact email text box and your restaurant contact number in the contact phone textbox.
You can also describe your restaurant specialties in the site description textbox.
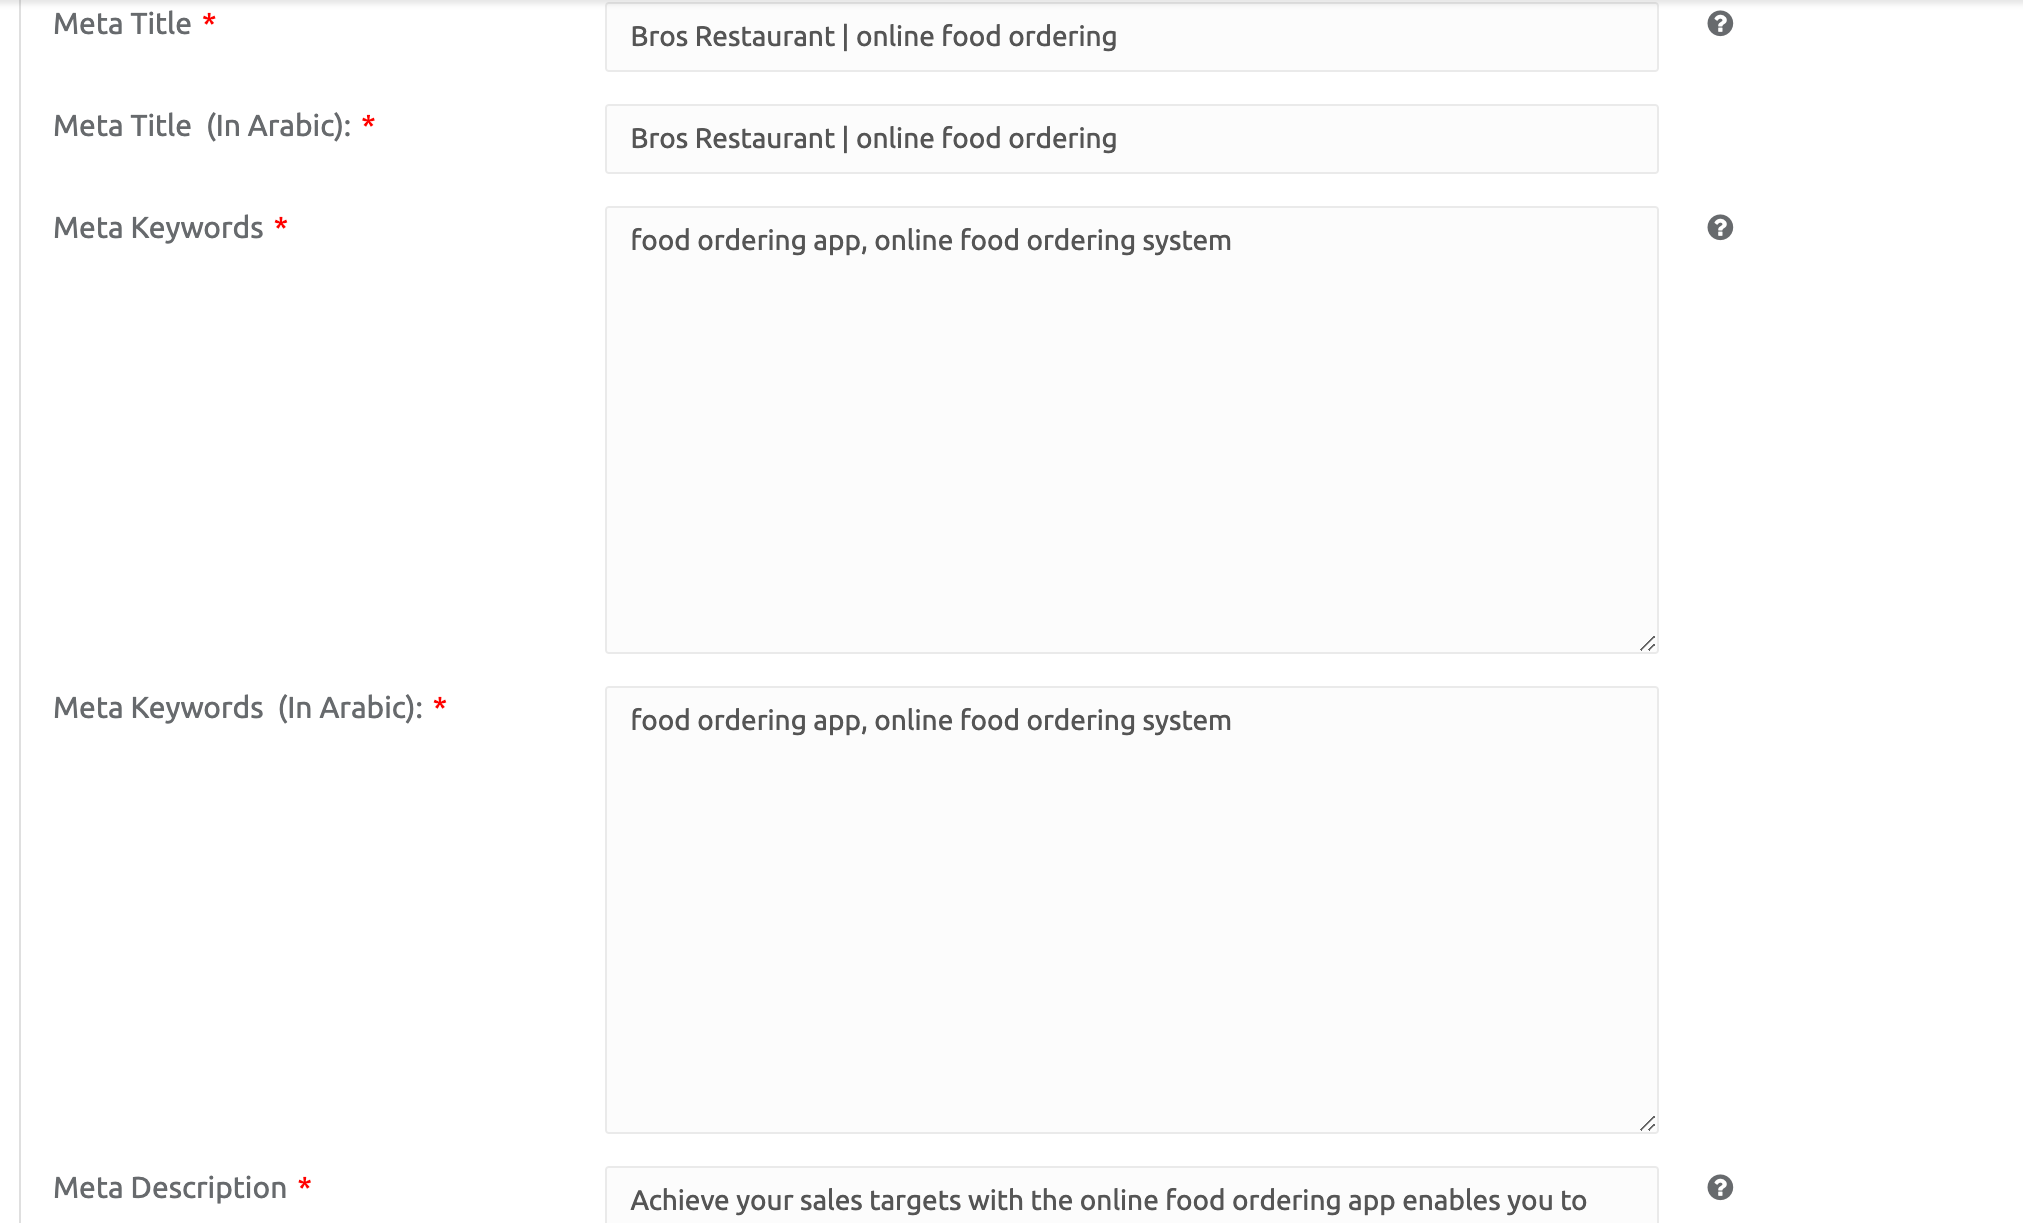
Meta title and keywords help your site rank higher in the search engine. Make a wise decision in selecting the right keywords and for the meta title.
Give your restaurant description with the combination of selected keywords and enter it in the textbox.
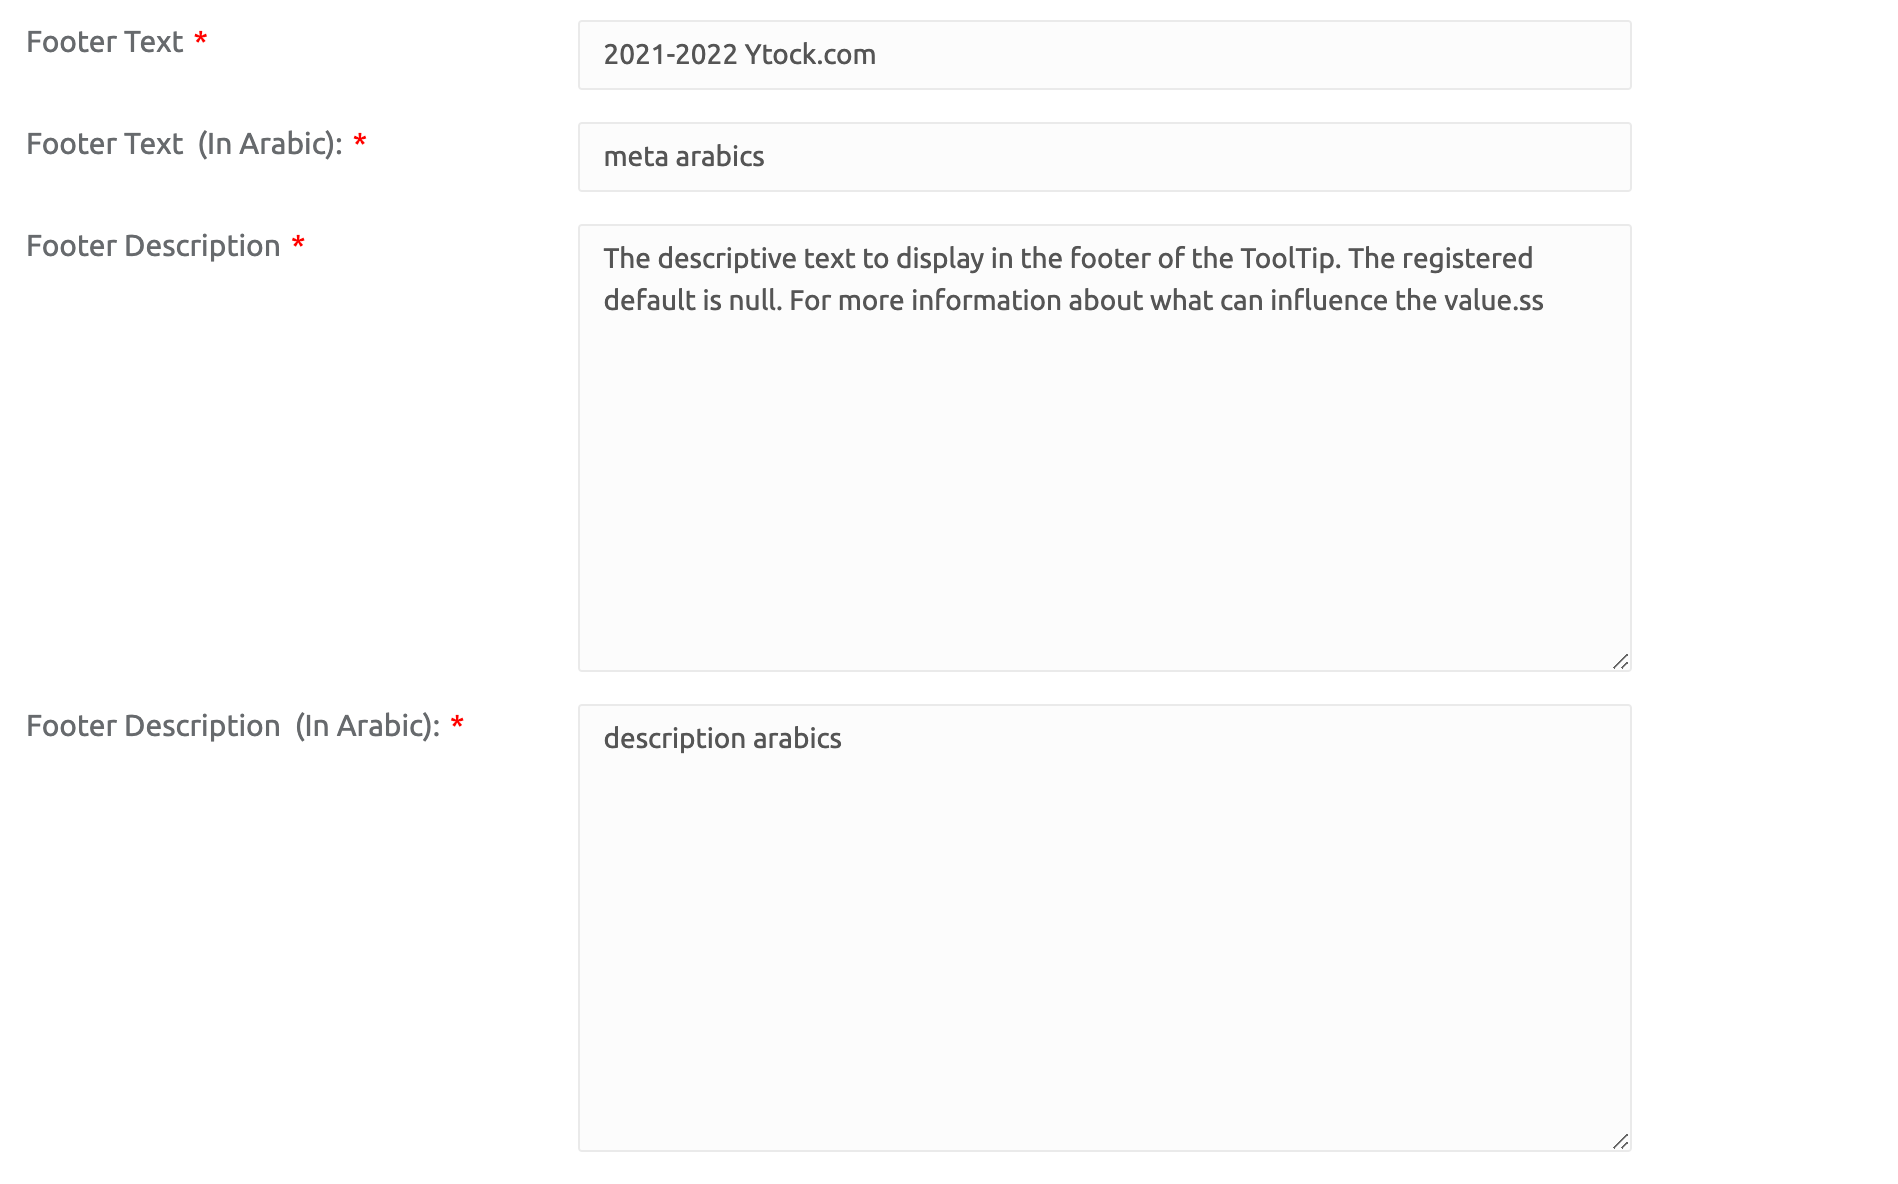
You can specify the version release year for your restaurant app in the footer text box.
To add a professional appearance to your online ordering system, enter the footer description in the corresponding textbox.
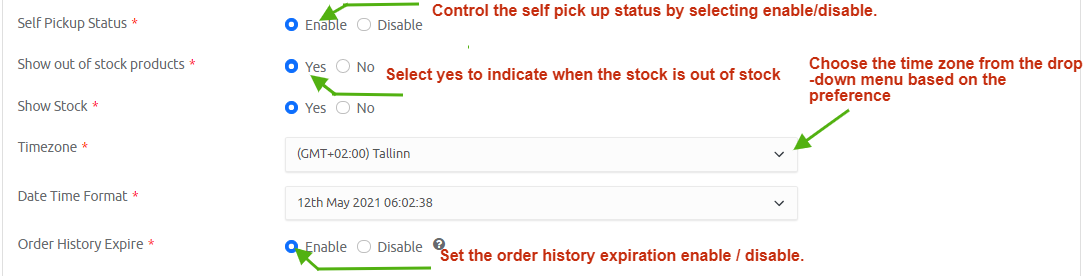
If you want to eliminate the waiting time of your customers, you can enable/disable self-pickup status, and you can also control the display of out-of-stock products and stock products by selecting the yes/no radio button.
Configure the date and time zone format for the Ytock platform based on your location.
Order history expiration can either be enabled or disabled depending on your choice.
Abandoned cart emails assist in recovering lost orders by reminding the abandoned cart shoppers to complete their purchase operation. Select Abandoned cart mail status enable/disable based on your preference in processing the customer emails.
By enabling the abandoned card mail status, Ytock lets you set the number of hours after a customer email is initiated by entering through a textbox.
A CAPTCHA prevents the automated programs or web crawlers, or bots from accessing the Ytock platform. CAPTCHA challenges users by giving a code to solve by humans. You can even control the captcha display by choosing any one radio button to enable or disable.
If the customer attempts to perform invalid login, the admin can suspend the account by selecting the enable or disable option.
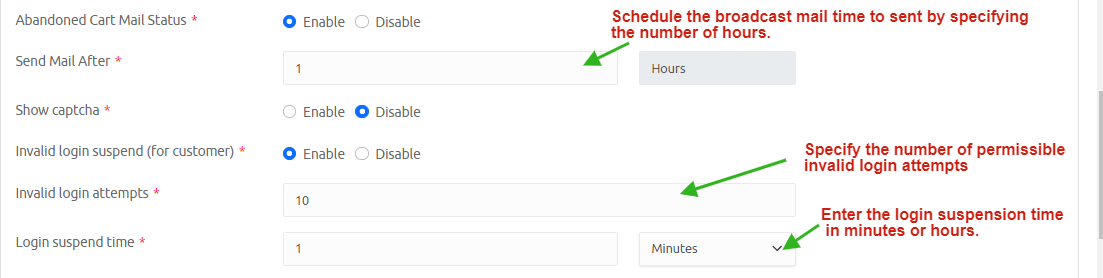
This section shows the total number of invalid login attempts that can be allowed within the textbox, along with the aggregate suspension time in terms of minutes by selecting from the list.
You even set the API key for currency converter by choosing the API of your preference from the link given below the text box.

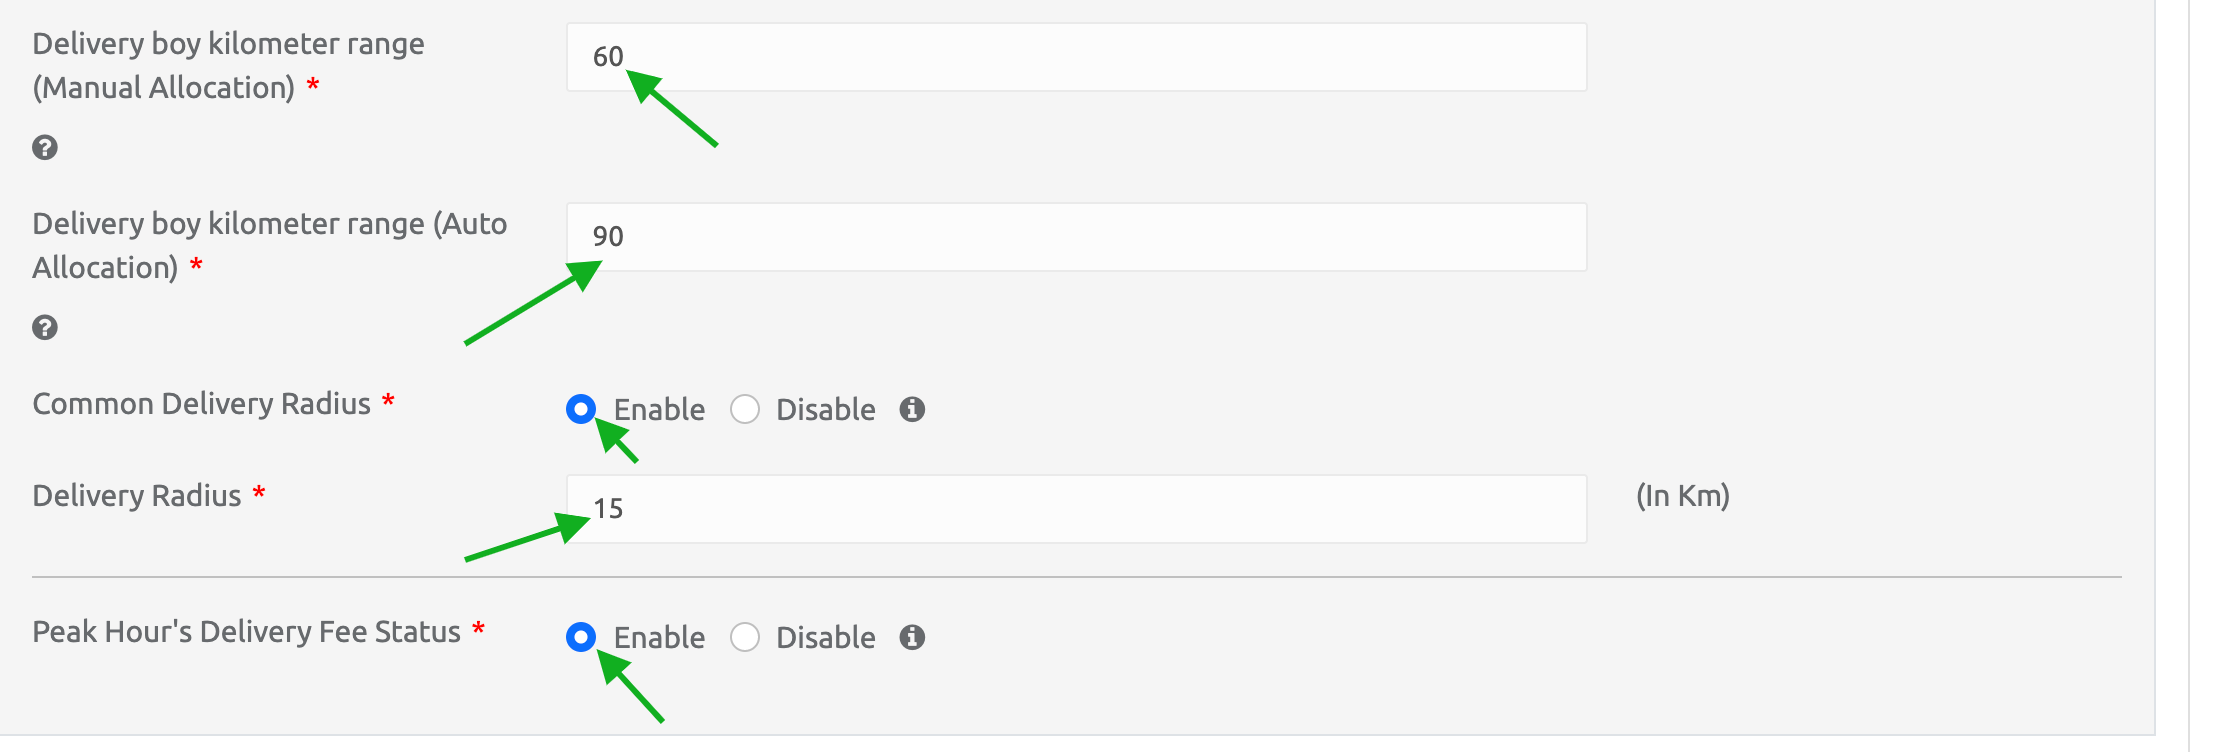
In the delivery fee part, the admin can choose the delivery fee status to enable or disable and select the delivery fee type as a common delivery fee or a fee per kilometer by choosing anyone option.
Type the delivery fee in terms of dollars in the text box. You can also specify the time for a delivery preparation in terms of minutes in the textbox.

Delivery radius gives the permitted distance served by the restaurants to the customers. It helps to preserve the efficiency level of your restaurant service and motivates customers to place more orders to your restaurant.
Delivery boy kilometer range manual allocation - Allocates order to the delivery boy within the specified kilometer range when the delivery manager engaged auto allocation.Delivery boy kilometer range manual allocation - Allocates order to the delivery boy within the specified kilometer range when the delivery manager engaged auto allocation.
Delivery boy kilometer range auto allocation - Assigns a food order to the delivery boy under the restaurant serving kilometer range when the delivery manager engages manual allocation.
Common delivery radius - Configure the permissible delivery radius by selecting enable or disable by option as per your wish.
Specify the delivery radius in terms of kilometers within the textbox and select the peak hour delivery fee status either enabled/ disabled considering your restaurant preference.
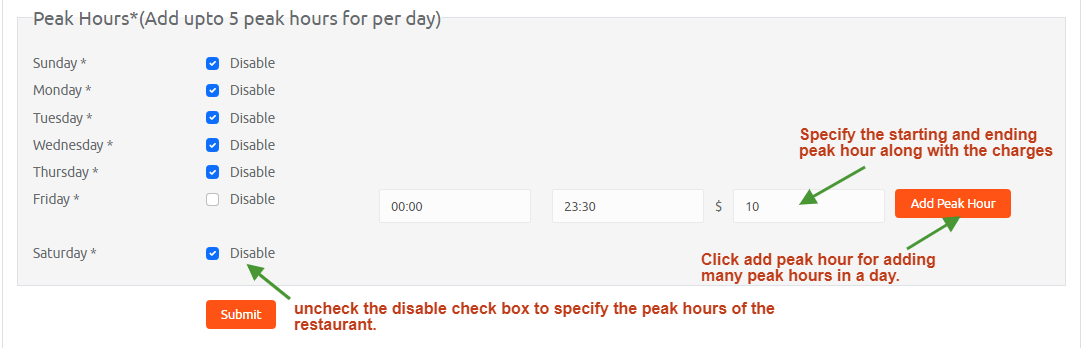
Under the peak hours section, enter the starting and ending time in the textbox, and in the following textbox, specify the amount in dollars.
Add extra peak hours to your restaurant for every hour by clicking the add peak hour button. It leads to the creation of additional rows containing the start and end times for the new entry.
On the left side panel of Ytock, Click SMTP settings.
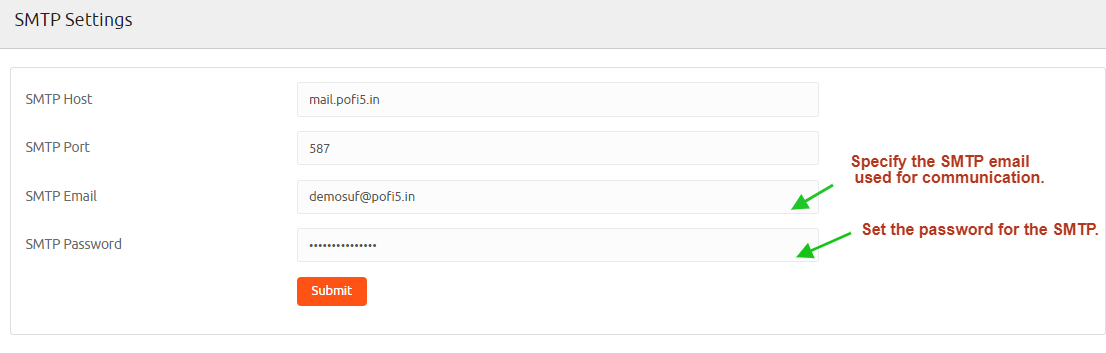
Enter the SMTP host in the text box along with the port details.
Change the SMTP email to the email address of your restaurant
Type a new password for the SMTP in the corresponding textbox and click the submit button.
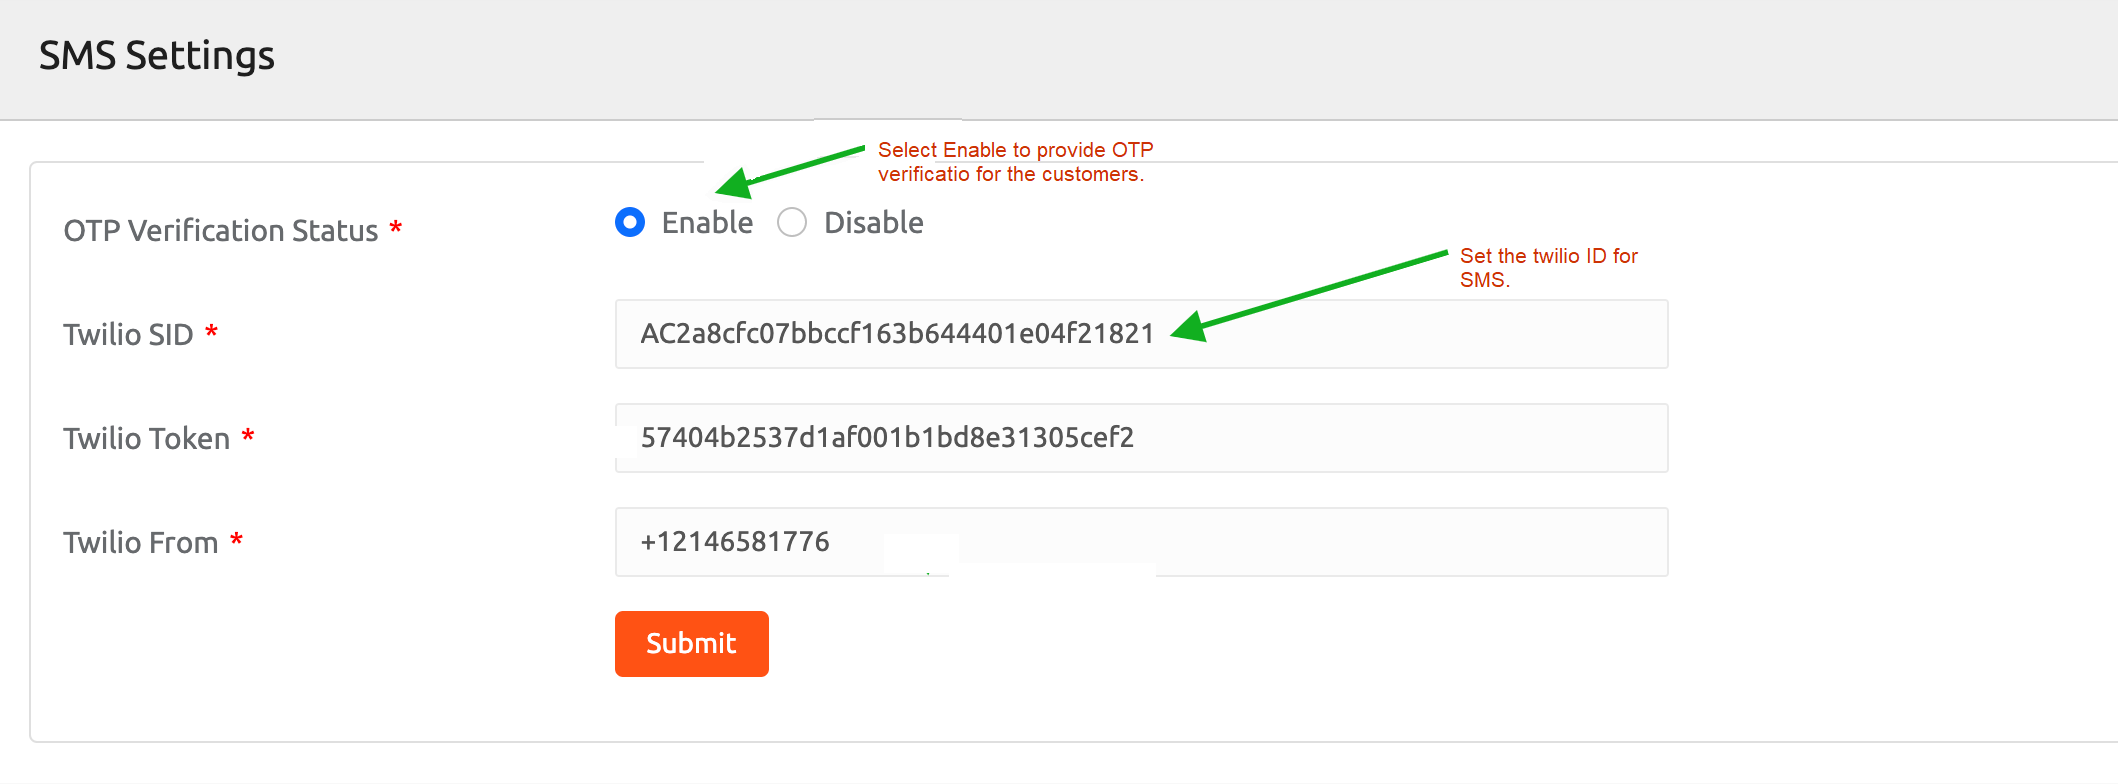
OTP is used to secure the private credentials and data of your restaurant platform. It reduces the risks associated with fraudulent login attempts and stolen data. Select the radio button for the OTP verification status, either enable or disable.
Twilio SID - A unique identification code for the TwiML app used to send a message to the customer by entering 34 bits.
Twilio Token - It confirms the client identity and privilege access to the client API features.
Twilio from - The Twilio phone number that transmits a message to the customer starts with a format plus followed by country code and click the submit button.
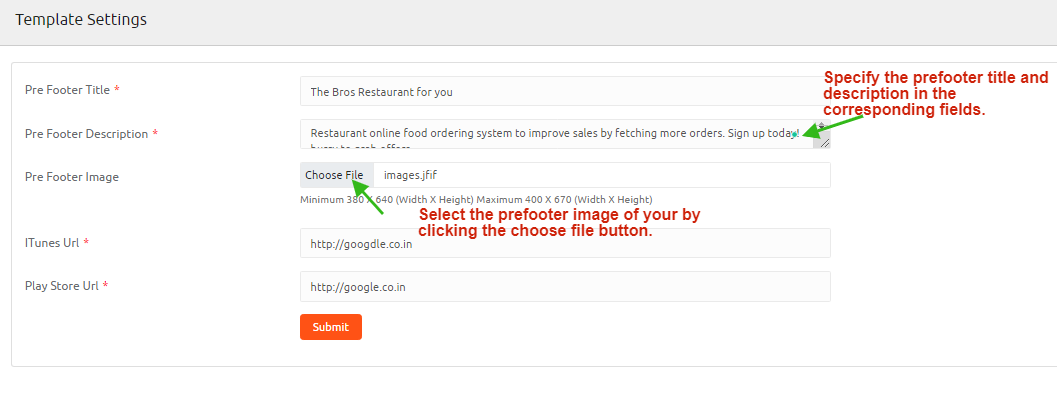
Generally, a pre-footer appears on the lower-left side of a webpage. This field assists in adding a map, contact details, and newsletter box to the site.
Type the pre-footer title text in the textbox along with the description stating the restaurant services.
You can also add an image to the pre-footer by clicking the choose file button upload the image as per your wish.
Specify the iTunes URL and Playstore URL in the corresponding text box and click the submit button to save the records.
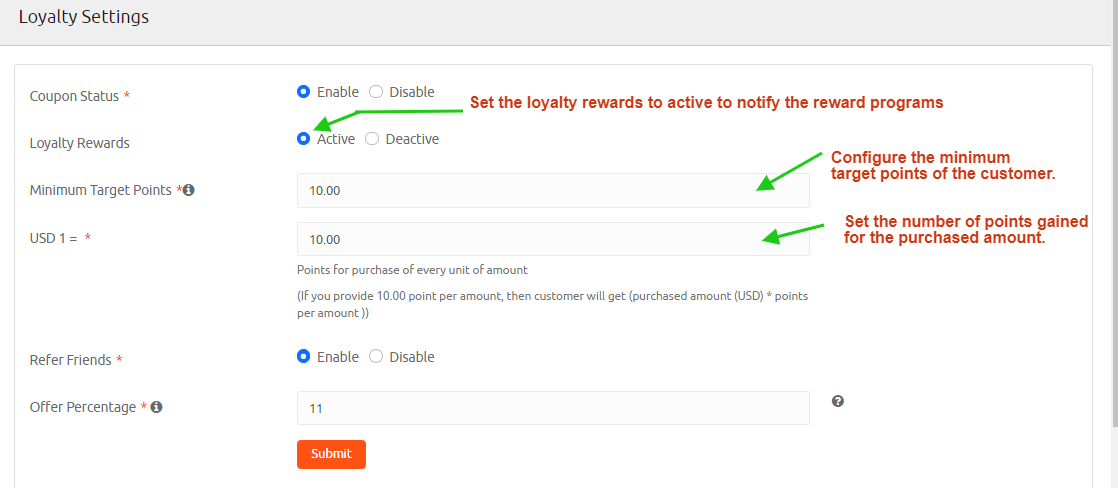
Customize your loyalty settings by clicking the left side panel. Coupons and loyalty rewards work in promoting restaurant sales.
Coupon Status - Enable/disable the status of the coupon by clicking the radio button.
Loyalty Rewards - You can set the loyalty rewards to active or deactivate state based on the timeline.
Minimum Target Points - Minimum points required for the customer to avail of the loyalty rewards.
USD 1 - The customer gets the points based on the total purchase amount, for example, purchased amount (USD)* points per amount.
Refer Friends - Refer friends option helps the customer to gain the reward points. Select Enable /disable based on your restaurant loyalty program preference.
Offer Percentage - When the customer refers a friend, a certain percentage of reward points is credited to the customer account based on the purchase amount made by the friend.
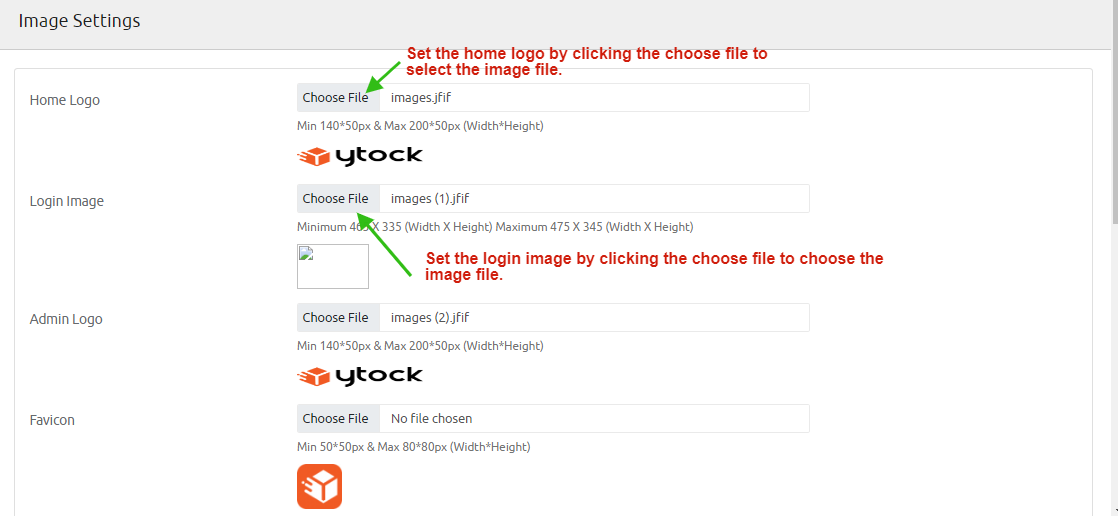
Home Logo It serves as branding for your restaurant and helps the customer to find out your restaurant effortlessly. Upload your restaurant logo under the allowed height between 140x50px and 200x50px. Click the choose file button, which pops up a dialog box. Select the desired image file to upload the image.
Login Image Configure the login form image with the Minimum 465 X 335 (Width X Height) and Maximum 475 X 345 (Width X Height). Click choose file button, and in the dialog box, select the image as per your wish to upload the image.
Admin LogoSet the Admin logo with Min 140*50px & Max 200*50px (Width*Height). Click the choose file button that pops up a dialog box, select the desired image to upload the image.
FaviconThis image appears at the top of the browser tab of your restaurant page. Favicon image should be within Minimum 50*50px and Maximum 80*80px (Width*Height).
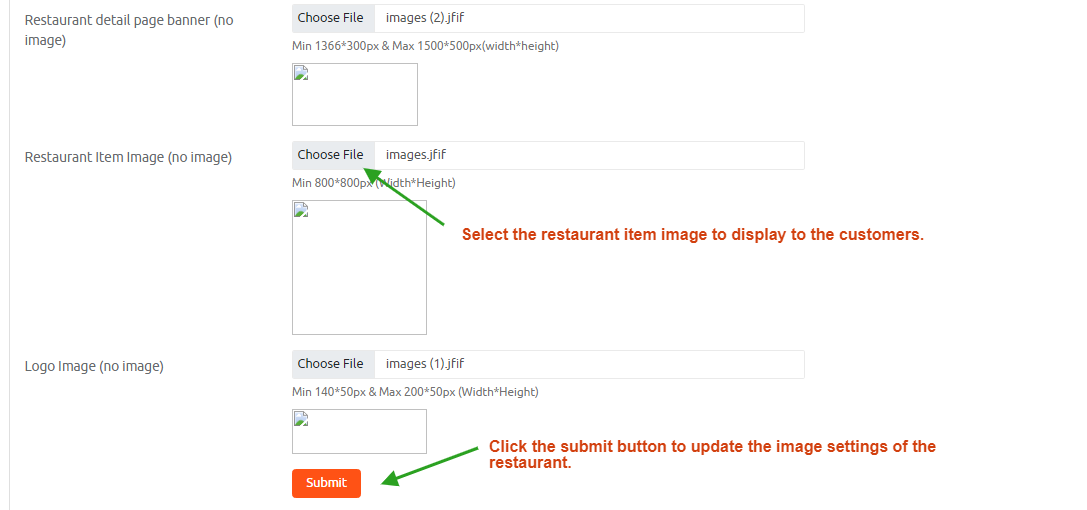
Restaurant detail page banner It is used to design a creative layout for your restaurant but see that the width and height fall under Minimum 1366*300px and Maximum1500*500px(width*height).
Restaurant Item Image You can upload attractive images of your restaurant dishes with theMinimum 800*800px (Width*Height).
Logo ImageA logo is the first visual symbol to identify your restaurant name and used in restaurant promotion activities.
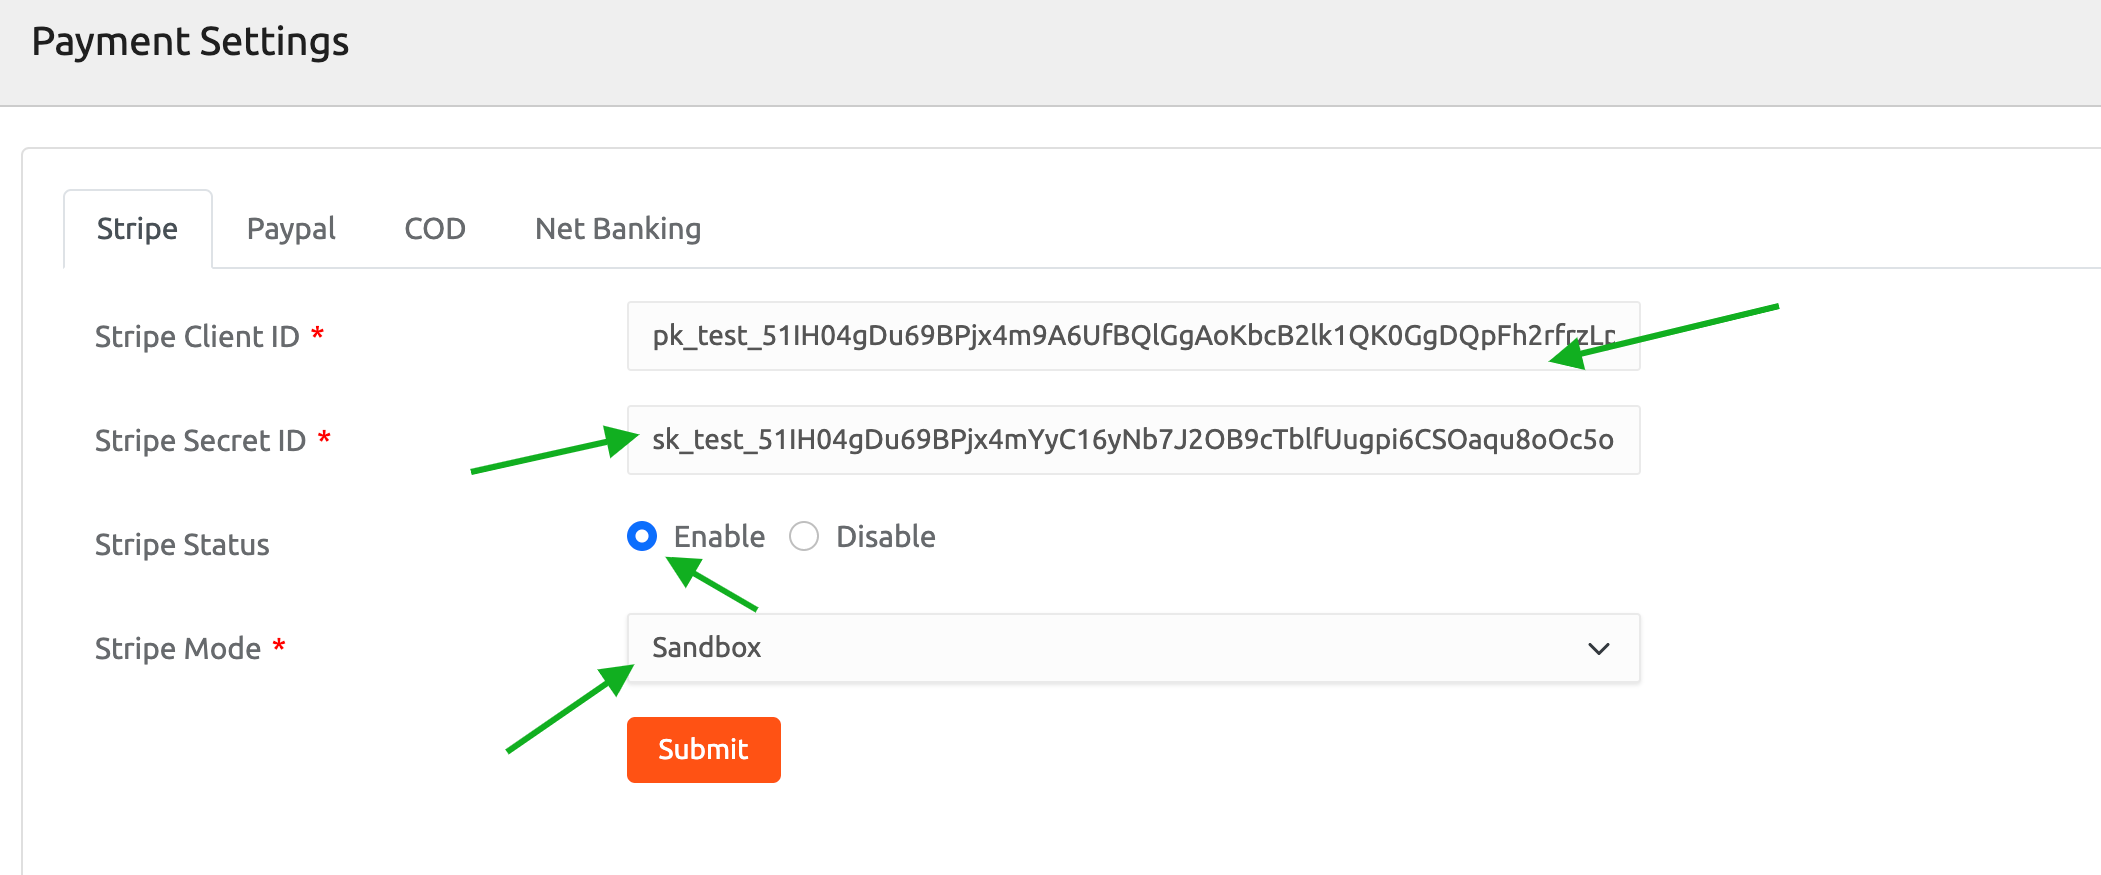
Stripe Client ID - Upon the account creation in Stripe Connect payments, you will get the Client ID, secret key, and a publishable key. Copy and paste the ID from Stripe into the text field.
Stripe Secret ID - Type the secret ID in the text box.
Stripe Status - You can either Enable or disable the Stripe status by choosing the radio button.
Stripe Mode - Select the stripe mode either, sandbox or live from, the list.
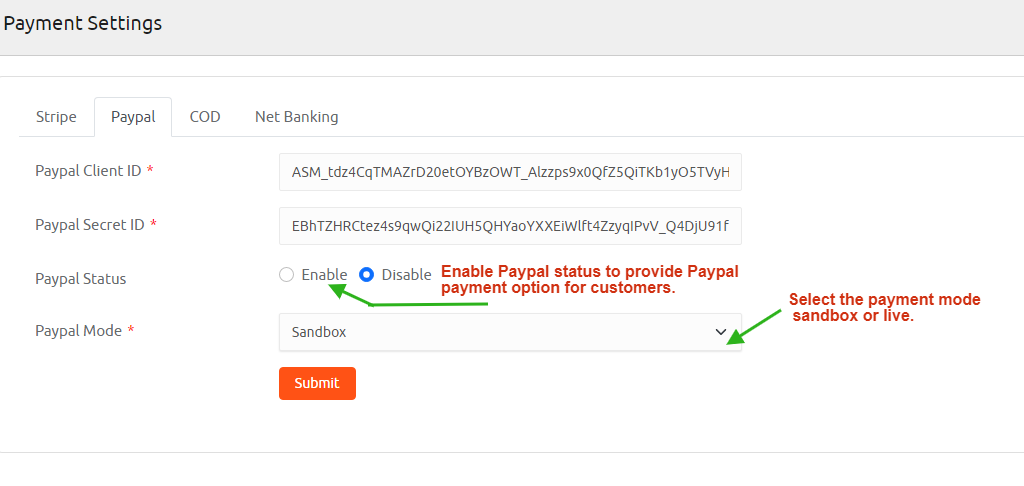
Paypal Client ID - Upon the account creation in Paypal Connect payments, you will get the Client ID, secret key, and a publishable key. Copy and paste the ID from Paypal into the text field.
Paypal Secret ID - Type the secret ID in the text box.
Paypal Status - You can either Enable or disable the Paypal status by choosing the radio button.
Paypal Mode - Select the Paypal mode either, sandbox or live from, the list.
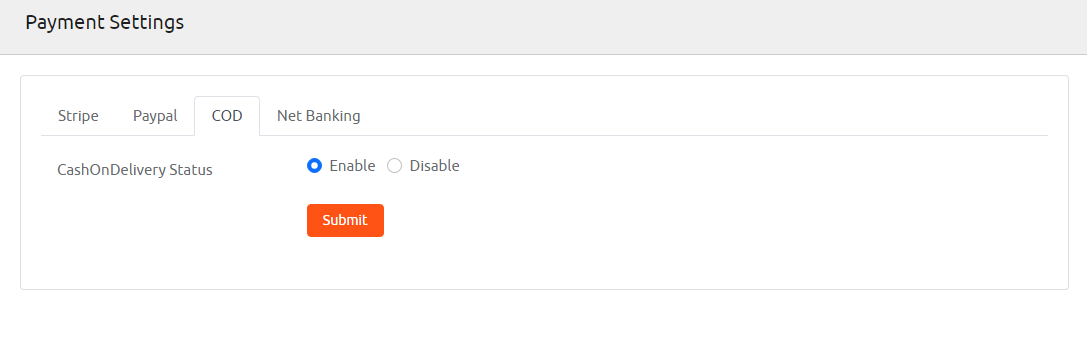
If you wish to offer the cash on the delivery choose enable or disable option by selecting the radio button and click the submit button.
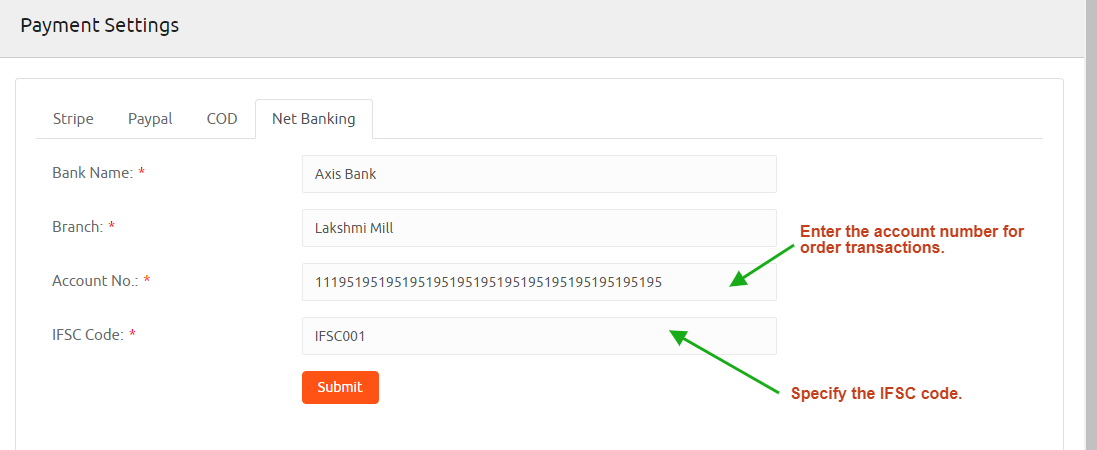
Input the bank name, branch of the bank, account number, and IFSC code in the appropriate fields, then click the submit button to save the bank details.
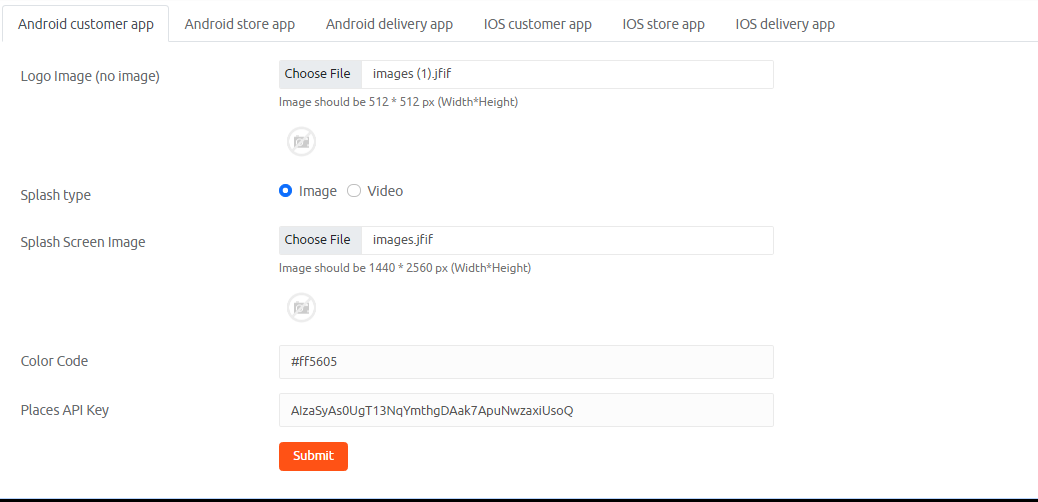
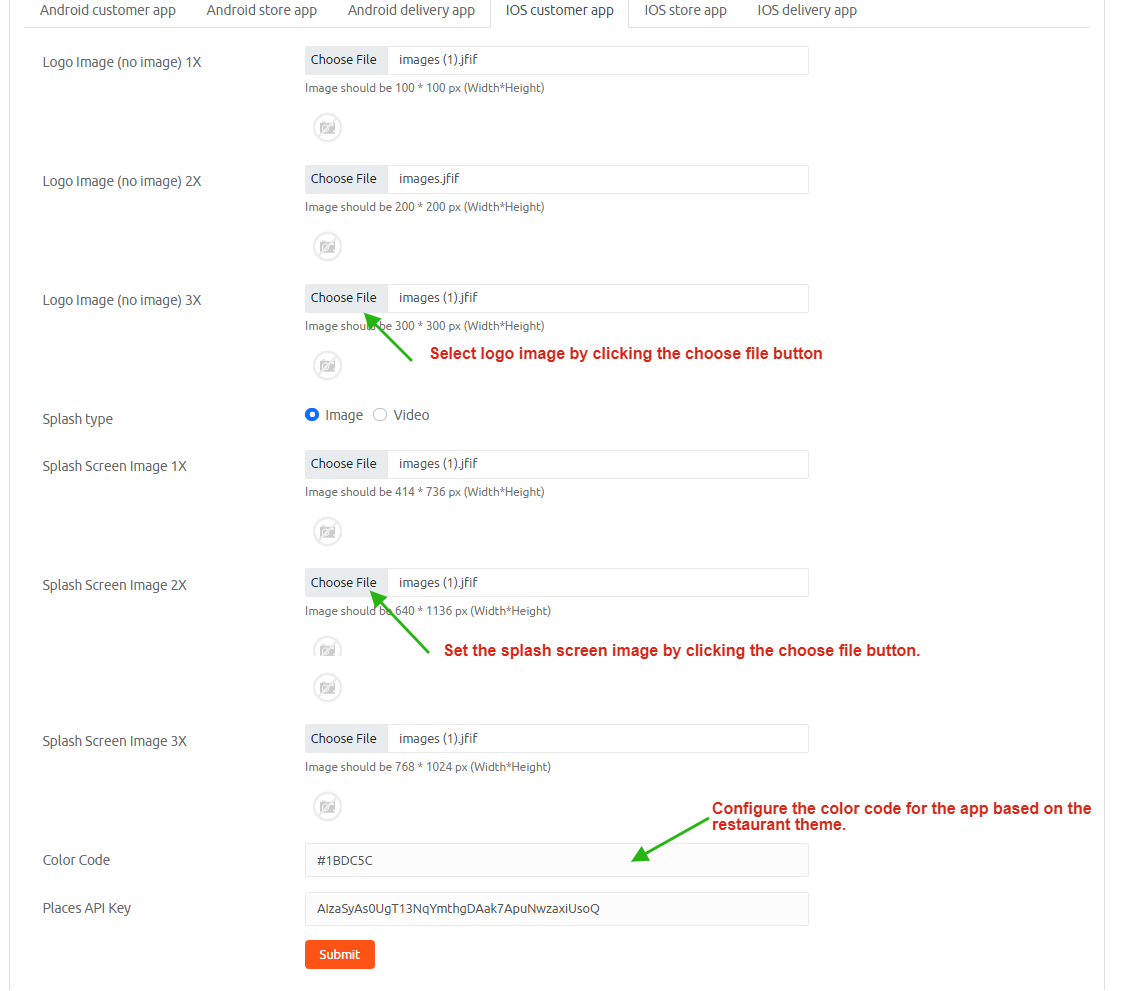
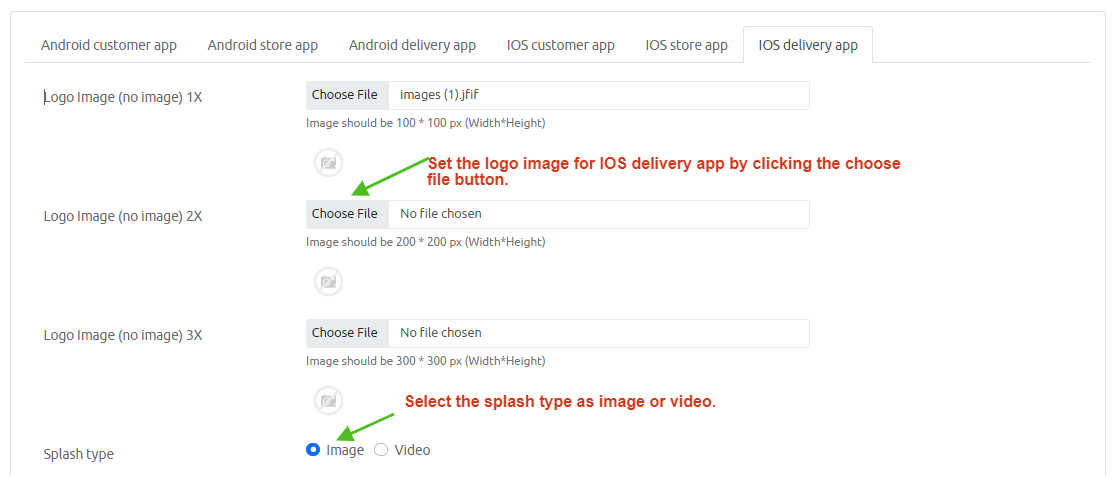
Logo Image - Upload the logo image by following the width and height settings 512 * 512 px by clicking the choose file button, and that pops up a dialog box, select the desired file. Click the open button to upload the image.
Splash type - It is a graphical element such as icons or splashes displayed during the app launch. Select either image or video from a radio button.
Splash Screen Image - Click the choose file button to upload the image with the allowed width and height as 1440 * 2560 px.
Color Code - Input the color code that your app, buttons, fonts, menus which appear in the same color to the users.
Places API Key - It gives the geographic locations of the restaurant with an API key using HTTP requests and Google Maps API key used to access the google maps for your restaurant. Now save the details by clicking the submit button.
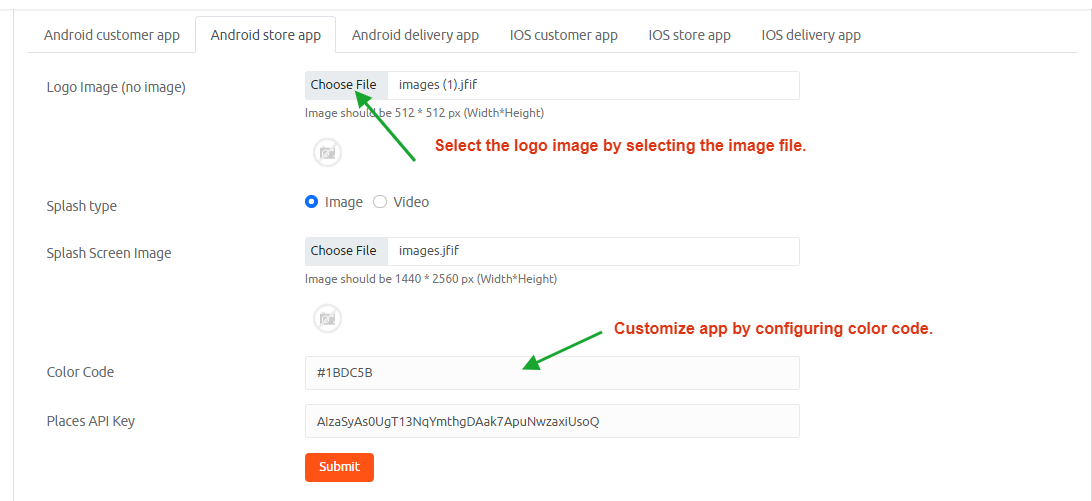
Logo Image - Upload the logo image by following the width and height settings 512 * 512 px by clicking the choose file button, and that pops up a dialog box, selecting the desired file. Click the open button to upload the image.
Splash type - It is a graphical element such as icons or splashes displayed during the app launch. Select either image or video from a radio button.
Splash Screen Image - Click the choose file button to upload the image with the allowed width and height as 1440 * 2560 px.
Color Code - Input the color code that your app should appear to the users.
Places API Key - It gives the geographic locations of the restaurant with an API key using HTTP requests and Google Maps API key used to access the google maps for your restaurant. Now save the details by clicking the submit button.
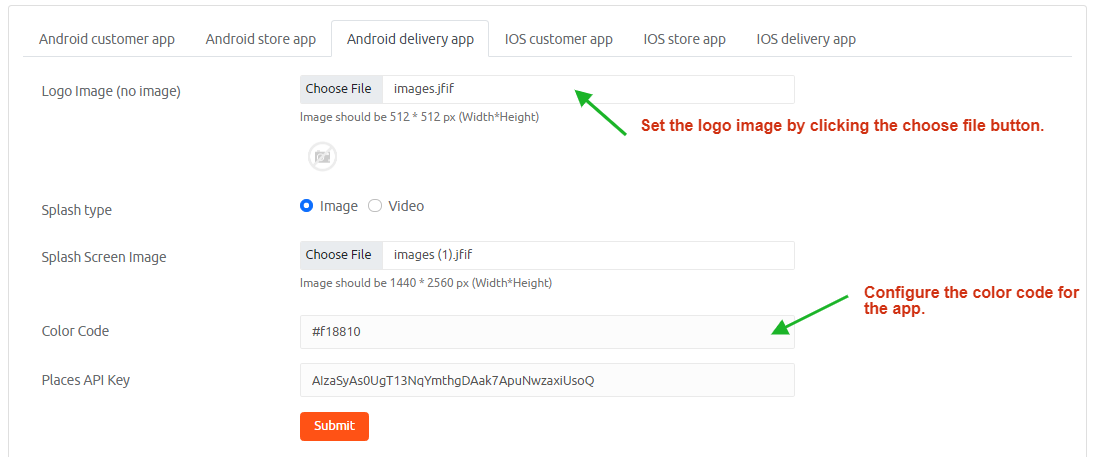
Logo Image - Upload the logo image by following the width and height settings 512 * 512 px by clicking the choose file button, and that pops up a dialog box, select the desired file. Click the open button to upload the image.
Splash type - It is a graphical element such as icons or splashes displayed during the app launch. Select either image or video from a radio button.
Splash Screen Image - Click the choose file button to upload the image with the allowed width and height as 1440 * 2560 px.
Color Code - Input the color code that your app should appear to the users.
Places API Key - It gives the geographic locations of the restaurant with an API key using HTTP requests and Google Maps API key used to access the google maps for your restaurant. Now save the details by clicking the submit button.


Social Media Settings
Social media settings help your online restaurant system connected with social media platforms.
Facebook App ID(Web) - This is a unique identification number to distinguish your app when a customer places a request. If you already hold a Facebook app ID, type the ID in the corresponding box.
Facebook App Secret - An app will have an app ID and app secret for processing the requests of Facebook. Facebook App secret protects sensitive data by decoding the encrypted messages with the secret key. Type the32 character App secret in the text box. For more information, please refer to the Facebook Documentation here.
Facebook Redirect URL - When the user successfully login to Facebook, redirect them back to the restaurant page. Enter the Facebook redirect URL in the text box.
Facebook Link - Enter the profile page URL of Facebook to link with your restaurant.
Google App ID(Web) -Specify the App ID available in the Google Playstore.
Google Secret Key - Copy the access key and the secret key from the google account and paste them into the field.
Google Redirect URL - Insert the redirect URL after the user logs into the system.
Google Page URL - Type the Google home page URL.
Google Play Store Link ( Customer App ) - The customer app available in the google play store retrieves the URL from it and paste it into the appropriate field.
Itunes Link ( Customer App ) - Similarly, extract the Itunes Link for the customer app and provide it in the text box.
Google Play Store Link ( Merchant App ) - Retrieve the Google Playstore link and paste it into the corresponding field.
Itunes Link ( Merchant App ) - iTunes store used to purchase, play, download, and organize digital media content. Copy the iTunes link and paste it into the text field.
Google Play Store Link ( Delivery Person App ) - Acquire the delivery person app link from the google play store to link your restaurant.
Itunes Link ( Delivery Person App ) - Get the Delivery person app link from Itunes and paste it into the text field.
Twitter Page URL - Define the Twitter page link of your restaurant.
Linkedin Page URL - Create a Linkedin page for your restaurant page and paste the URL in the textbox.
Analytics Code - Analytics code traces website activity like bounce rate, session duration, site traffic, and the number of pages per session.
Google Map key - It is a personal key given by Google to access Google Maps of your site.