
First Name - Enter the first name of the outlet manager in the text field.
Last Name - Input the last name of the outlet manager in the text box.
Email - Insert the restaurant email address for processing the customer queries.
Password - Configure the password for the restaurant account.
Mobile No. - Include the phone number for communication with the customers.

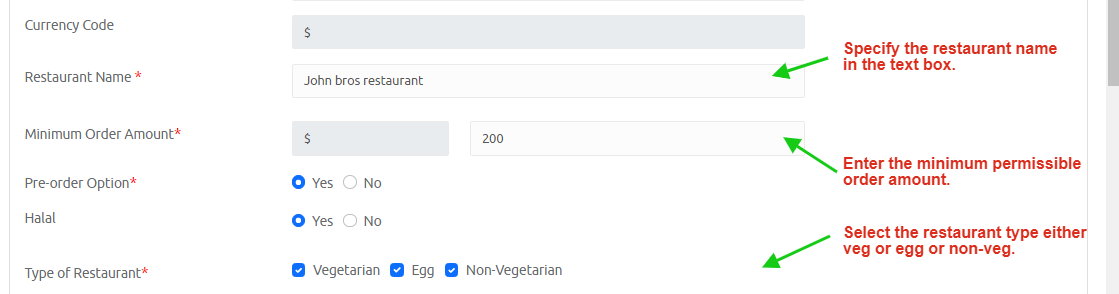
Currency Code - This field permits you to specify the code for the currency supported by the restaurant app.
Restaurant Name - Input the restaurant name in the corresponding text field.
Minimum Order Amount - Configure the minimum order value processed online.
Pre-order Option - Pre-order enables the customer to set the time for the food delivery. Select Yes/ No with the radio button.
Halal - Select Yes/ No based on your restaurant serving Halal foods.
Type of Restaurant - Categorize the restaurant type by selecting the check box, either Vegetarian or Egg or Non-Vegetarian.
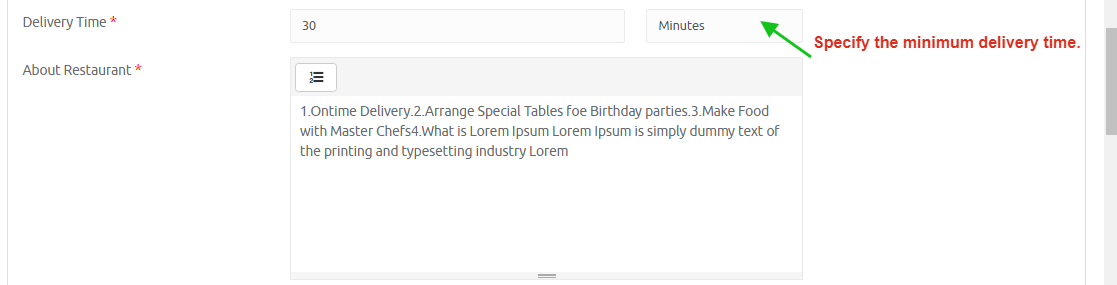
Delivery time - Set the minimum delivery time for a food order in terms of minutes.
About the restaurant - This field gives a detailed description of the services of the restaurant and its unique features.
Cancel Status - Allow/ disallow cancel status used to permit the users to avail cancellation.
Cancellation Charge - Select Allow to set the cancellation charge percentage for an order.
Cancellation Policy - You can enter the cancellation policy of your restaurant over the customer orders in the text field.

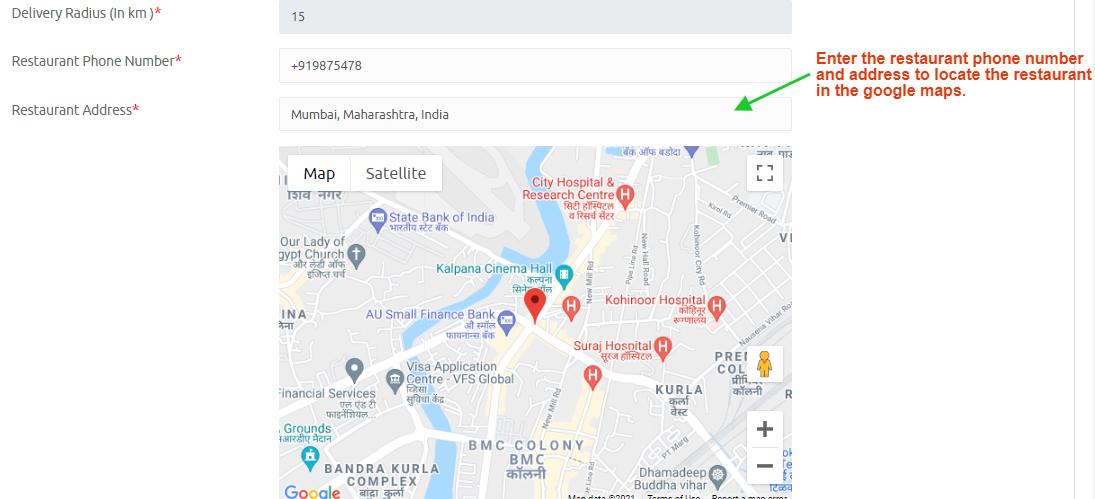
Delivery Radius (In km ) - Enter the delivery range covered by the restaurant is serving the customer in terms of a kilometer.
Restaurant Phone Number - Include the phone number of the restaurant for communication.
Restaurant Address - Add the restaurant address in the text box, either manual typing or move the pinpoint to the respective location so that the customer identifies the restaurant location.
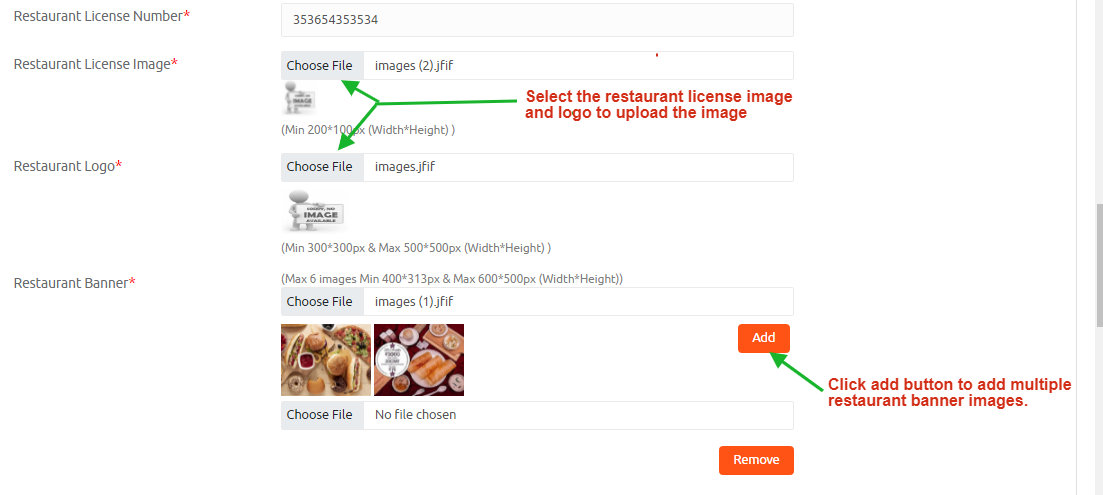
Restaurant License Number - Input the restaurant license number in the corresponding field.
Restaurant License Image - Click Choose file button and upload the image with minimum width and height requirements satisfying 200*100px.
Restaurant Logo - Include the restaurant logo to display for the customer with the width and height of Minimum 300*300px and Maximum 500*500px.
Restaurant Banner - It entices the customers and assists in identifying your restaurant. Click choose file and upload the file, then click add to update the images.
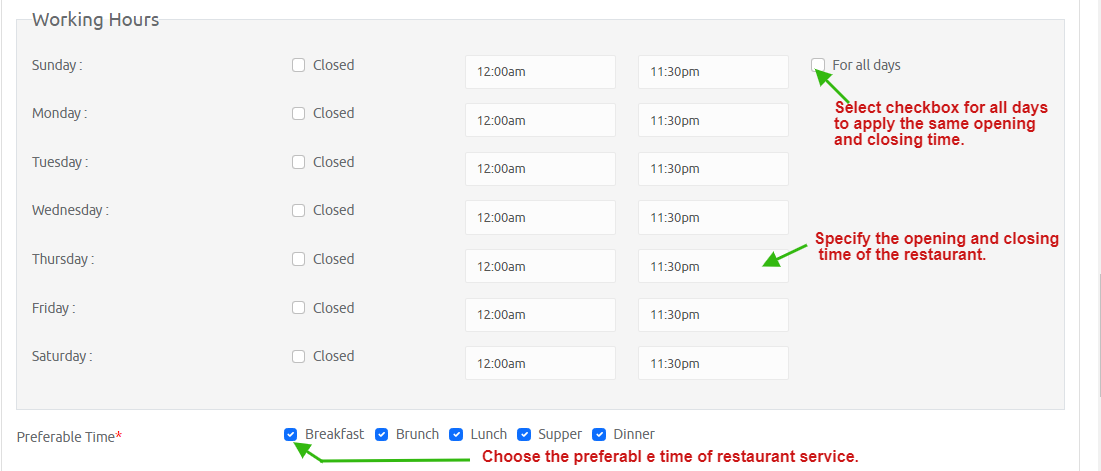
Working Hours - If your restaurant functions every day at the same time, you can enter the time in the text fields and select the check box for all days to apply for a whole week. You can declare a holiday by selecting the checkbox closed.
Preferable time - If your restaurant offers only breakfast, you can select the checkbox beside the breakfast. Select the checkboxes based on your restaurant serving time.
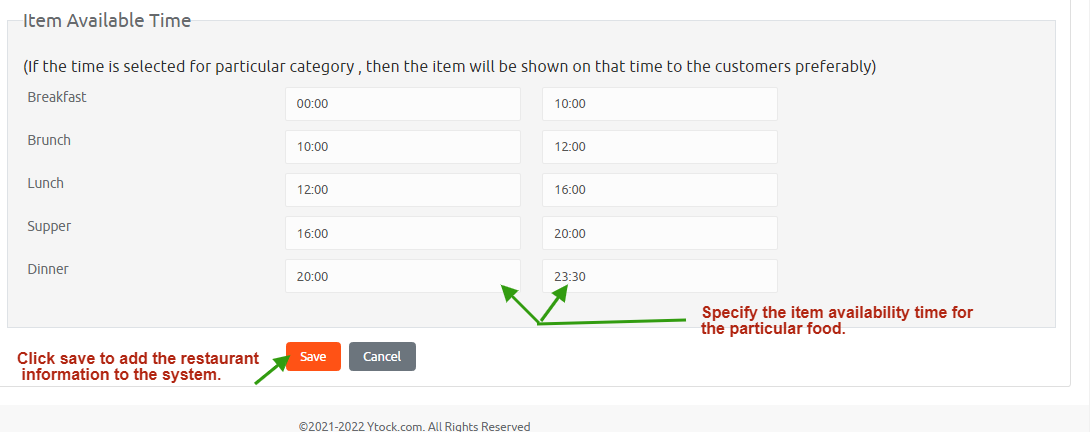
Item Available Time - If a particular food item is available for a specific time, then show the availability time of the food item. This field enables the customer to check the availability of the menu. Enter the starting and ending time of the food item and click the save button to save the field values.
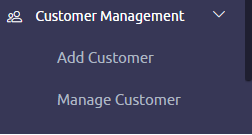
Customer Management review present in the left side panel. Press to expand, add customers and manage customers.
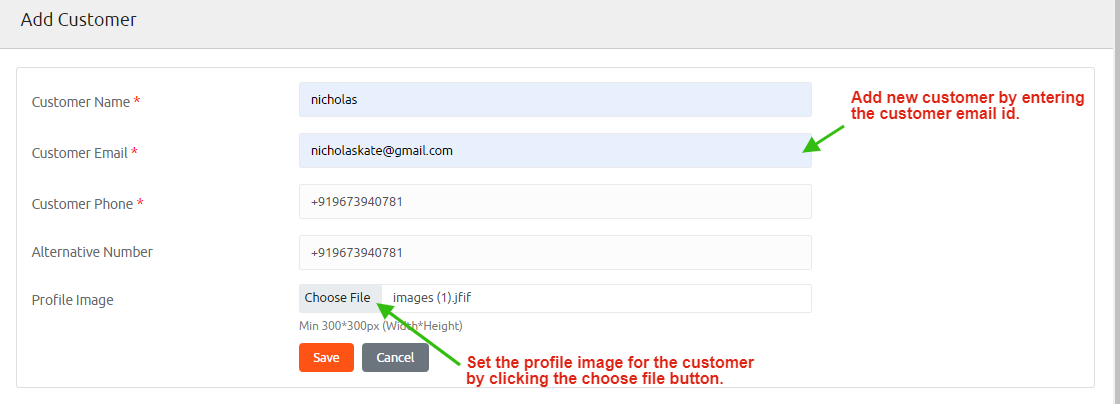
To add a new customer, input the customer name, email address, phone number, alternative number in the corresponding text field. You can also add a profile image by clicking the choose file button upload the desired file, and click the save button.
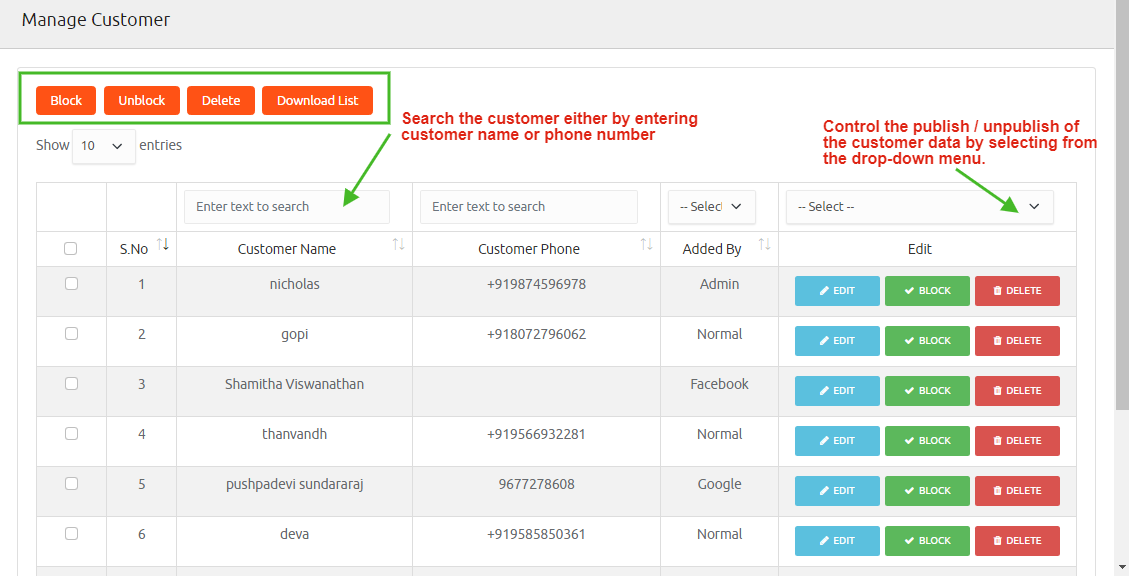
It lists out the customer name, phone numbers, and the added by field categorizes the customer whether the user is normal or added by admin or by Google or by Facebook. Select the publish option to display the unblocked records, and unpublish displays the blocked customer records.
Operations
Edit - You can edit the customer name and click the update button redirects to the customer management page with a flash message updated successfully.
Block - Select the customer you wish to block by ticking the checkbox, and click the block button, which flashes a message Blocked successfully.
Unblock - You can add the blocked element into the list by clicking the unblock button, which flashes a message unblock successfully.
Delete - Deletes the element from the list.
Download list - It permits downloading the excel file containing the customer and their contact details.
Item Management review present in the left side panel. Press to expand, add item, manage item, and item bulk upload.
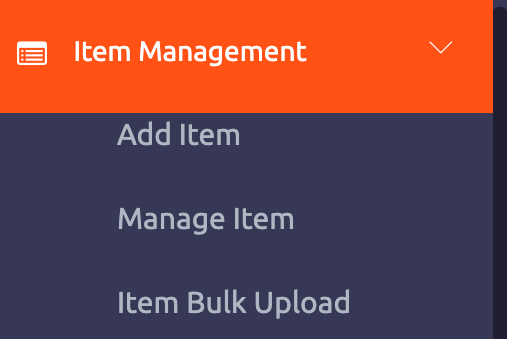
Add Item
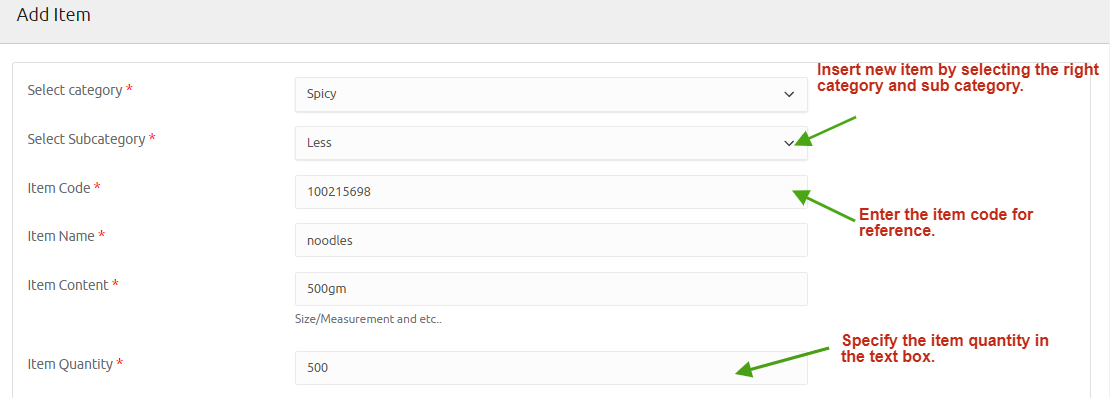
Select Category - Select the category from the list to include a new item, whether spicy or sweet or soup or beverages.
Select sub-category - Choose the sub-category from the list based on the new item added.
Item Code - Input the nine-digit item code value in the text field.
Item Name - Include the item name to insert the item into the list.
Item Content - You can specify the item content either as size or weight measurement.
Item Quantity - Specify the item quantity offered to the customers in the text box.
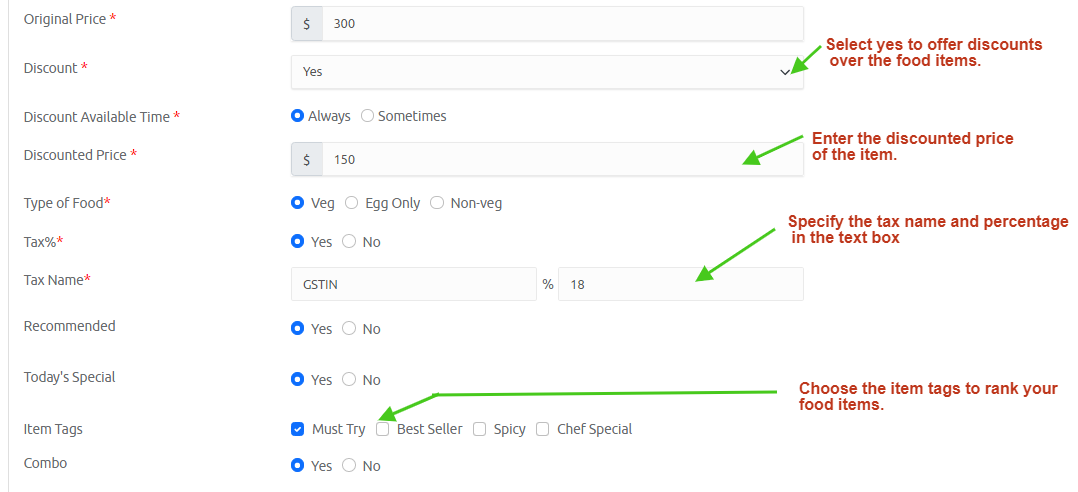
Original Price - You can specify the original price of the food item in the text field.
Discount - Admin can provide the discount to the food item by choosing the Discount status to Yes else select no.
Type of Food - You can categorize the food item either as Veg or Egg Only or Non-veg.
Tax% - Enable tax % by selecting yes and enter the tax name along with the percentage value in the text box.
Recommended - Display your restaurant menu items as highly recommended for the customers by selecting the Yes radio button.
Todays Special - You can notify your special dish of your restaurant by selecting the Yes radio button under Todays Special.
Item Tags - Adding tags to your menu helps the better visibility of your restaurant to the customer. Select the checkbox Must Try or Best Seller or Spicy or Chef Special depending on your interest.
Combo Pack - If you plan to offer a combo package offer to the customers at a nominal rate, select the Yes option from the radio button.
Halal - If your restaurant serves halal foods, select the Yes radio button.
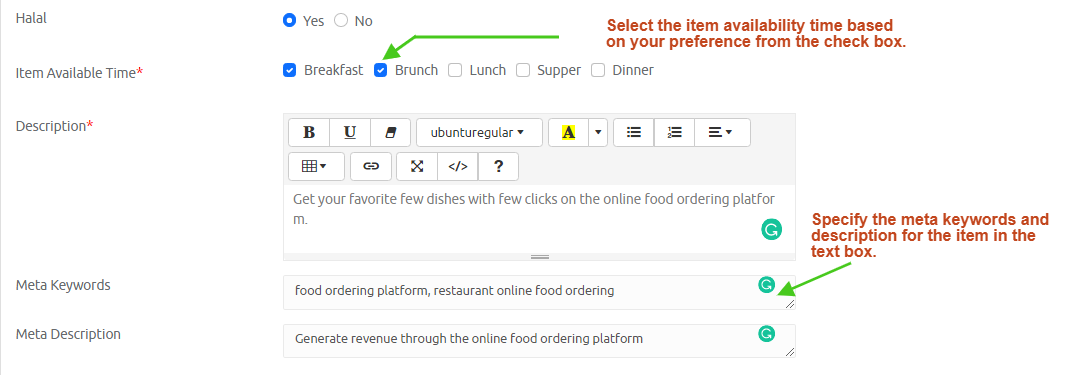
Item Available Time - You can specify the availability of the item tick checkbox either Breakfast or Brunch or Lunch or Supper Dinner.
Restaurant Logo - Include the restaurant logo to display for the customer with the width and height of Minimum 300*300px and Maximum 500*500px.
Description - Input the detailed description of the item, which helps the customer know more about the food item. It allows you to customize the font type, font color, bulleting, and add links to your restaurant description.
Meta Keywords - It assists your ranking higher, improves the visibility of your restaurant among the customers.
Meta Description - Write a compelling restaurant summary describing the services of the restaurant in the corresponding field.
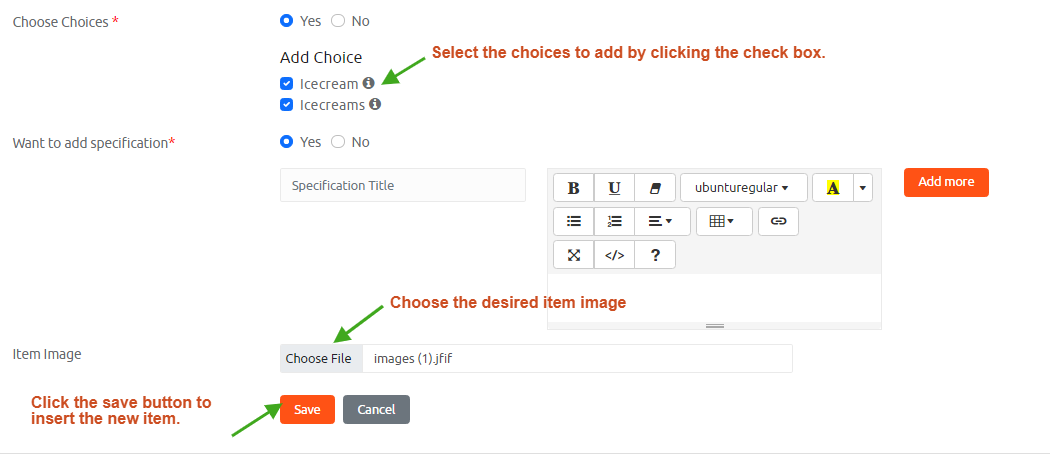
Choose Choices - You can add choices to the item by choosing the Yes radio button.
Add Choice - List out the choice available, and you can select the choice as per your wish.
Want to add specification - If you wish to add a specification to the item, then enter the item description with the customized settings of font size, color, and adding website links.
Item Image - You can upload the item image by clicking the choose file button. Select the desired image as of your interest and click the save button.
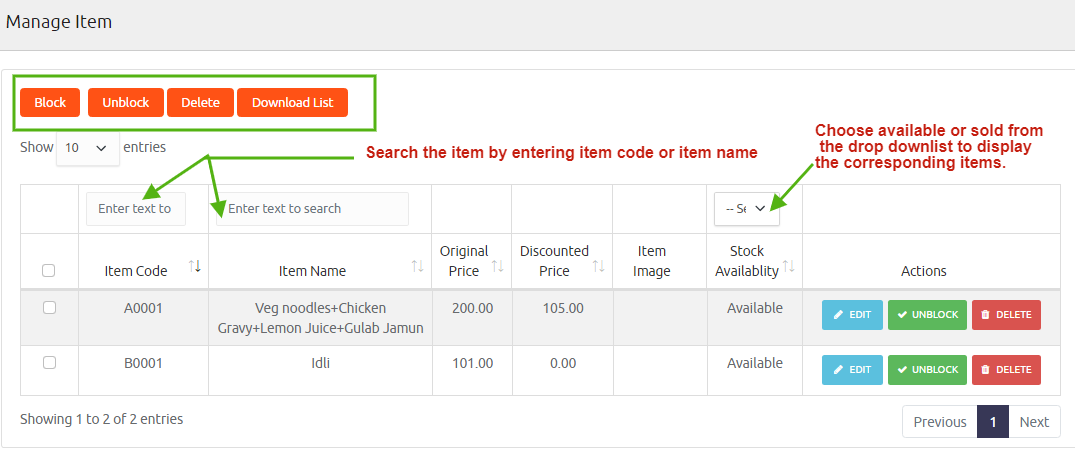
It lists out the item name, item code, original price, discounted price, along with the item image. If you want to search for a specific item, then enter the item name in the search box field to display the item details on the list. You can also check whether the item is available or sold by selecting the availability or sold from the list box.
Operations
Edit - You can edit the item name and click the update button redirects to the item management page with a flash message updated successfully.
Block - Select the item you wish to block by ticking the checkbox, and click the block button, which flashes a message Blocked successfully.
Unblock - You can add the blocked element into the list by clicking the unblock button, which flashes a message unblock successfully.
Delete - Deletes the element from the list.
Download list - It permits downloading the excel file containing the item name, code, pricing information, and availability.
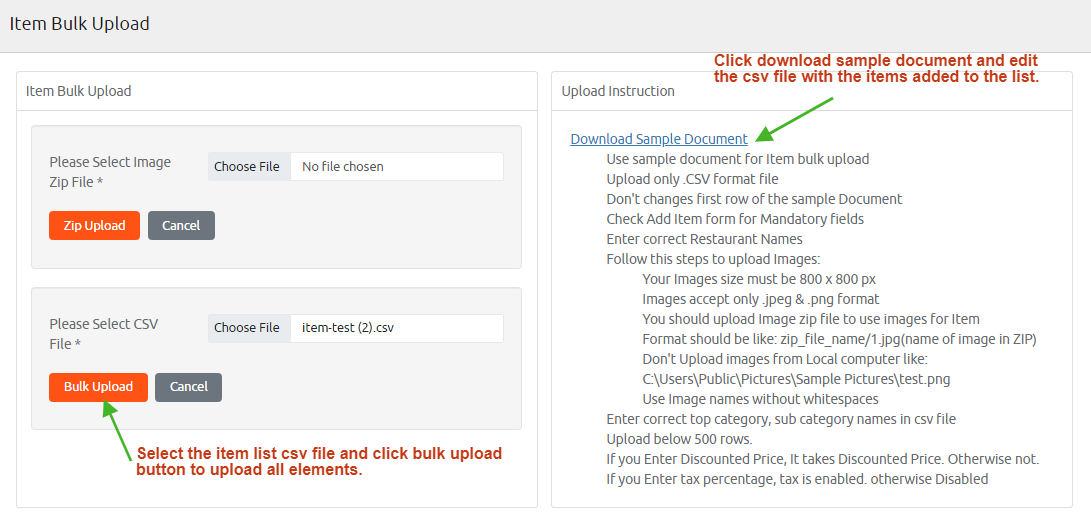
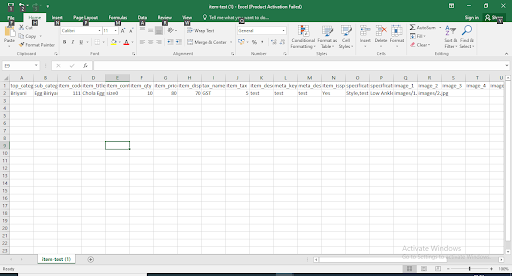
If you wish to add more items, then you can use the item bulk upload option. Click the download sample document to view the excel file, edit the field as per your restaurant item and save the file.
Click the choose file button and select the file by clicking the bulk upload button to upload the file./p>
To upload the image, click choose file button and select the desired image file then click the zip upload button.
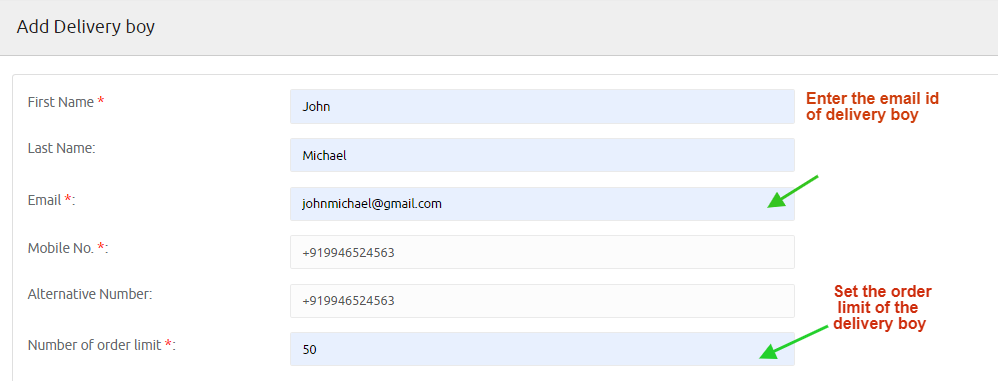
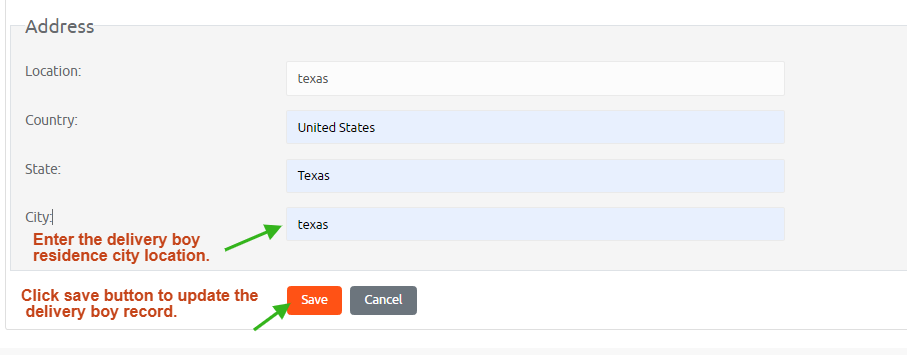
Add Delivery Boy Add a new delivery boy by entering the first name, last name, email address, mobile number, alternative number, number of order limit, address, city, country, and state, then click the save button to save the details.
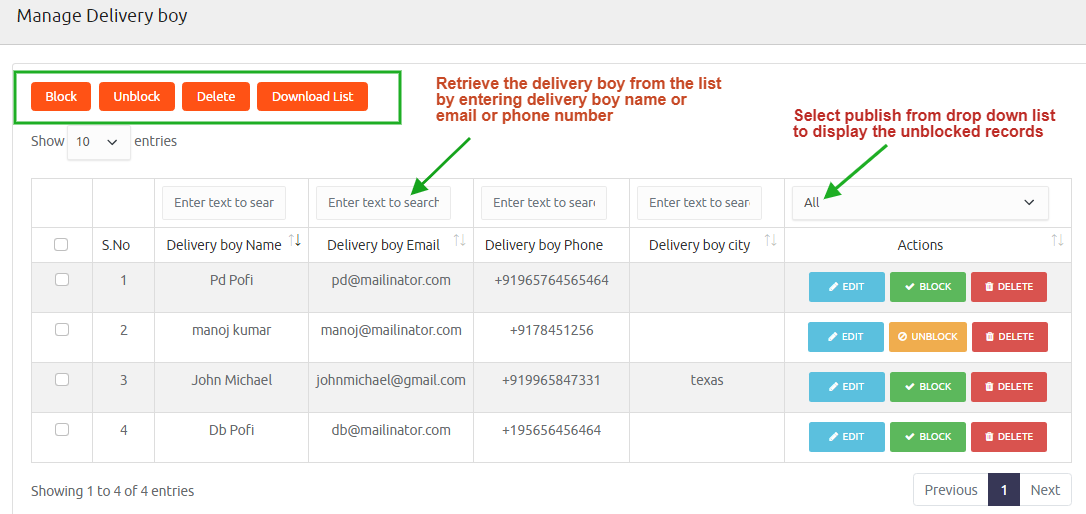
Manage Delivery Boy This page displays the name of the delivery boy, email address, phone number, and city. You can also search the delivery boy by typing the name of the delivery boy or email or phone number, or city in the search box.
Operations
Edit - You can edit the delivery boy details and click the update button redirects to the delivery boy management page with a flash message updated successfully.
Block - Select the delivery boy you wish to block by ticking the checkbox, and click the block button, which flashes a message Blocked successfully.
Unblock - You can add the blocked delivery boy into the list by clicking the unblock button, which flashes a message unblock successfully.
Delete - Deletes the delivery boy from the list.
Download list - It permits downloading the excel file containing the contact details of the delivery boy, name, address, and other details.
Manage coupon present in the left side panel. Press to expand, add coupons and manage coupons.
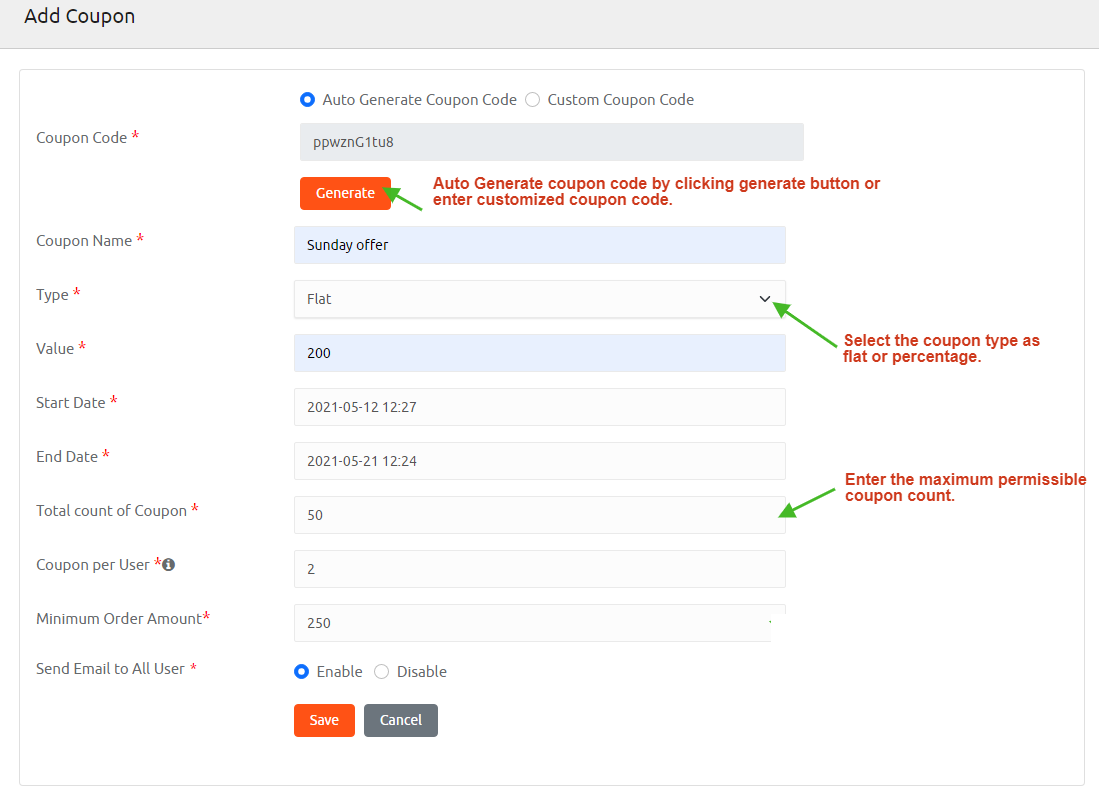
Add Coupon
Coupon code - If you wish to generate the coupon code automatically, select the auto-generate coupon code radio button. You can also create a custom coupon code by choosing a custom coupon code.
Generate coupon code - Click generate button to view the coupon code in the corresponding text field.
Type - You can offer a flat discount on the food items by choosing a flat from the list. Select a percentage to provide a specific percentage discount over the food items.
Start and End date - Select the date from the calendar to indicate the validity period of the coupon.
Total count of Coupon - You can also set the total number of coupons allowed to avail of the offer.
Coupon per User - Configure the number of permitted coupons for a single user account.
Minimum Order Amount - Set the minimum order amount for which the customer can avail of the coupon offer.
Send Email to All User - You can send broadcast emails containing your restaurant promotions and offers by selecting the enable radio button.
Manage Coupon
This page shows the coupon code, coupon name, coupon type, coupon validity, starting and ending date, status, the total number of coupons, used coupons, balance coupons with edit and delete operations.
You can also search the coupons by entering the coupon code or coupon name in the corresponding text boxes.
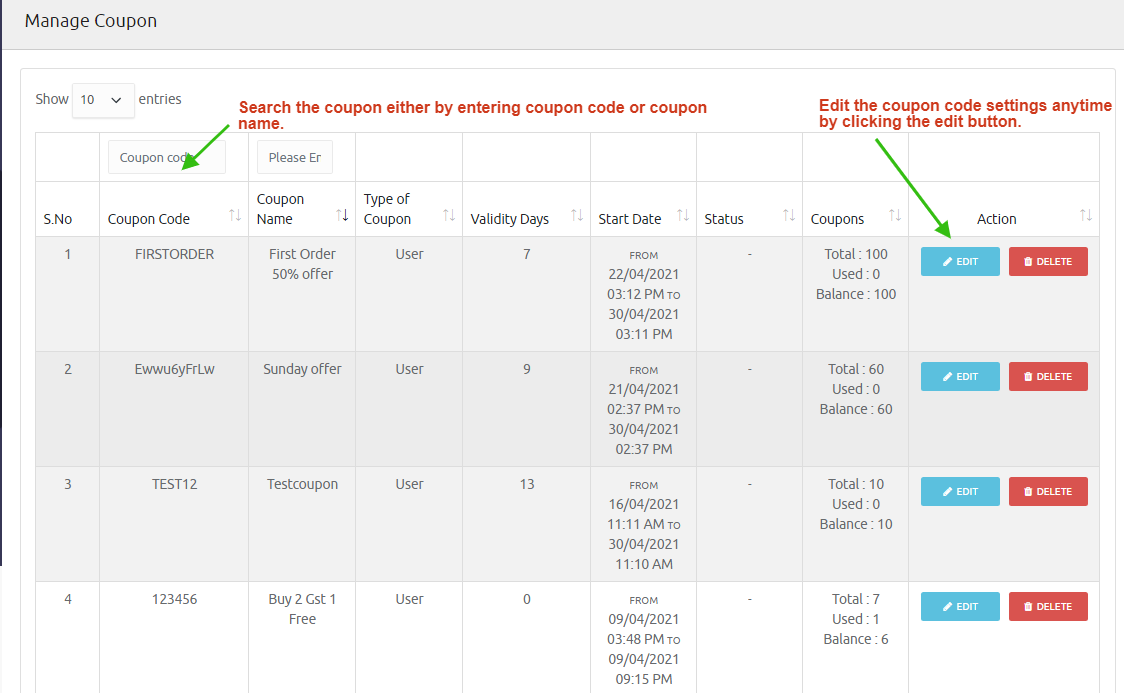
Operations
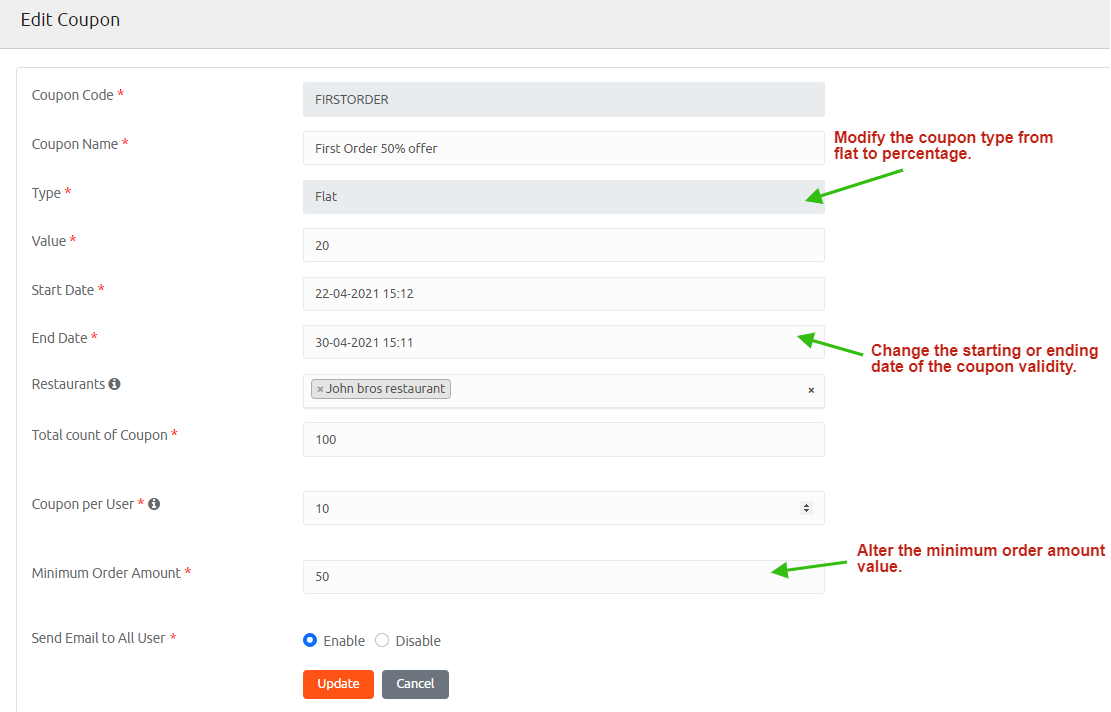
Edit - You can edit the coupon details under the coupon page, and click the update button redirects to the manage coupon page with a flash message updated successfully.
Delete - Deletes the coupon from the list.
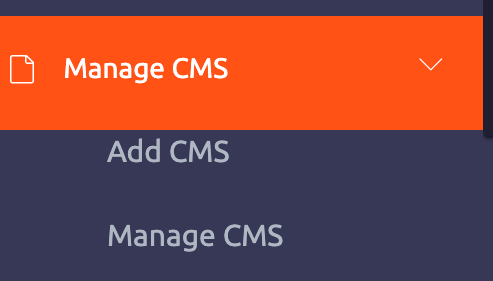
Manage CMS present in the left side panel. Press to expand, add CMS, and manage CMS.
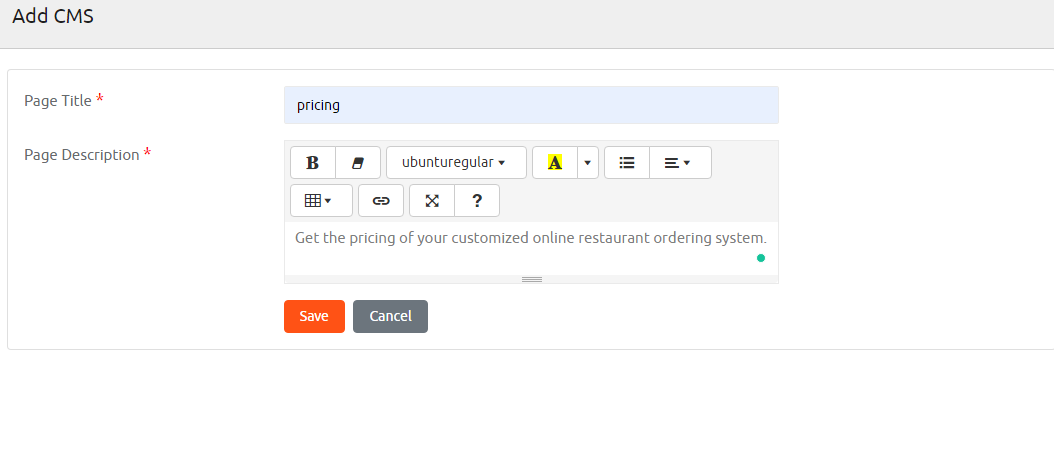
Add CMS
Page Title - Give the title of the page to display at the bottom of the page in the text box.
Page Description - You can also give a detailed description of the new page created and click the save button to save the page details.
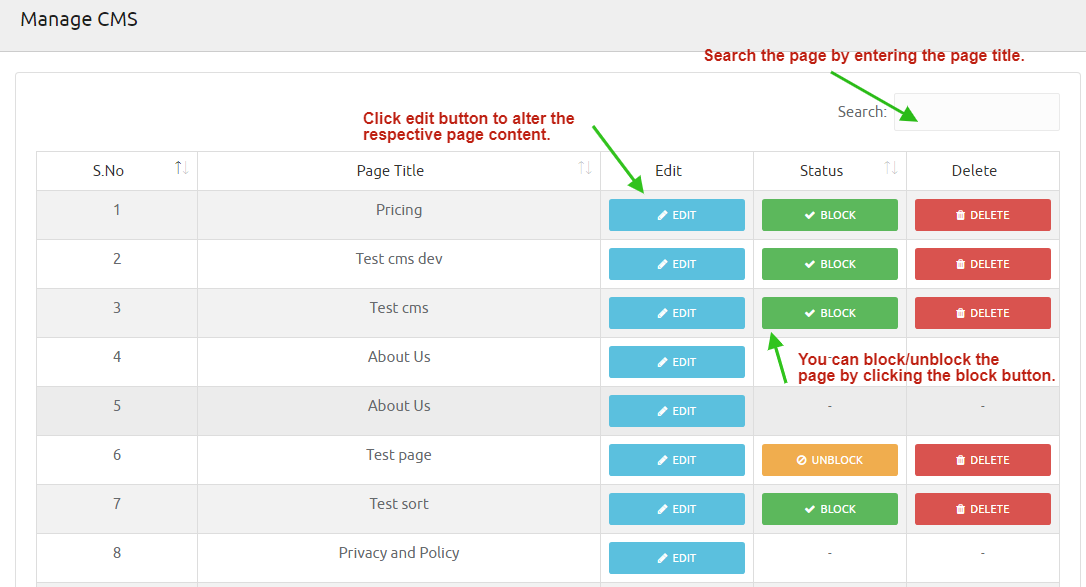
Manage CMS It lists out the page title and the status of the page, along with a set of operations. Retrieve the CMS by typing the page title in the search box.
Operations
Edit - You can edit the CMS details and click the update button redirects to the Manage CMS page with a flash message updated successfully.
Block - Select the CMS you wish to block by ticking the checkbox, and click the block button, which flashes a message Blocked successfully.
Unblock - You can add the blocked CMS into the list by clicking the unblock button, which flashes a message unblock successfully.
Delete - Deletes the CMS from the list.
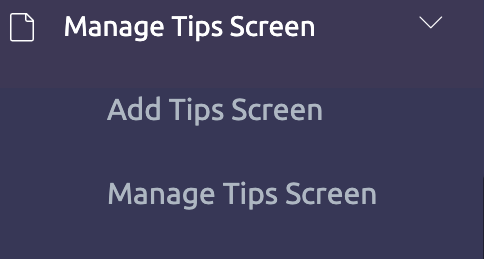
Manage tips screen present in the left side panel. Press to expand, add tips screen and manage tips screen.
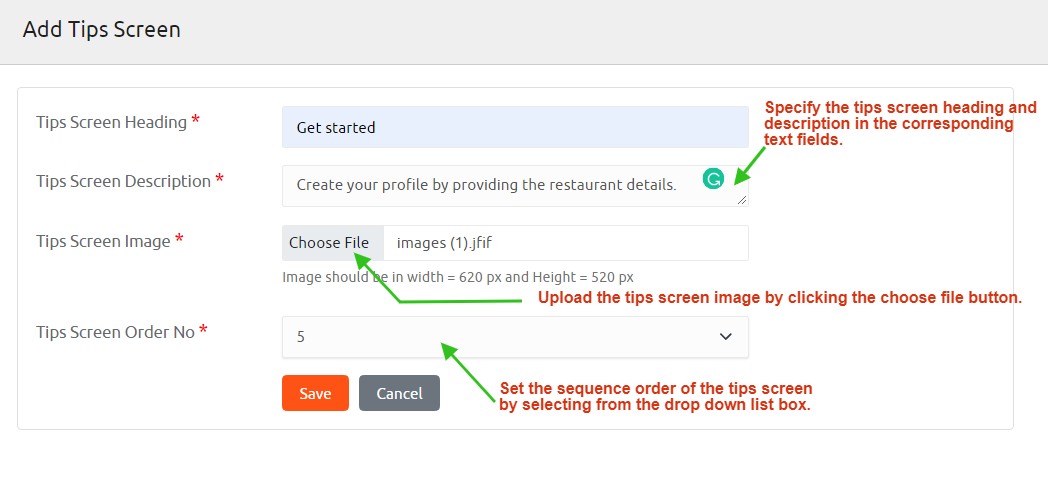
Add Tips Screen
Tips Screen Heading - This field is used to specify the title of the tips screen that appears in-app for assisting the customer in utilizing the app.
Tips Screen Description - Input a description to the tips by explaining steps associated with the effective use of the app.
Tips Screen Image - Include tips screen image by clicking the choose file button select the desired file to upload the image. The image size falls under the width 620 px and Height 520 px.
Tips Screen Order No - With the list of tips screen order, you can select the order in which the screen should appear from the drop-down list.
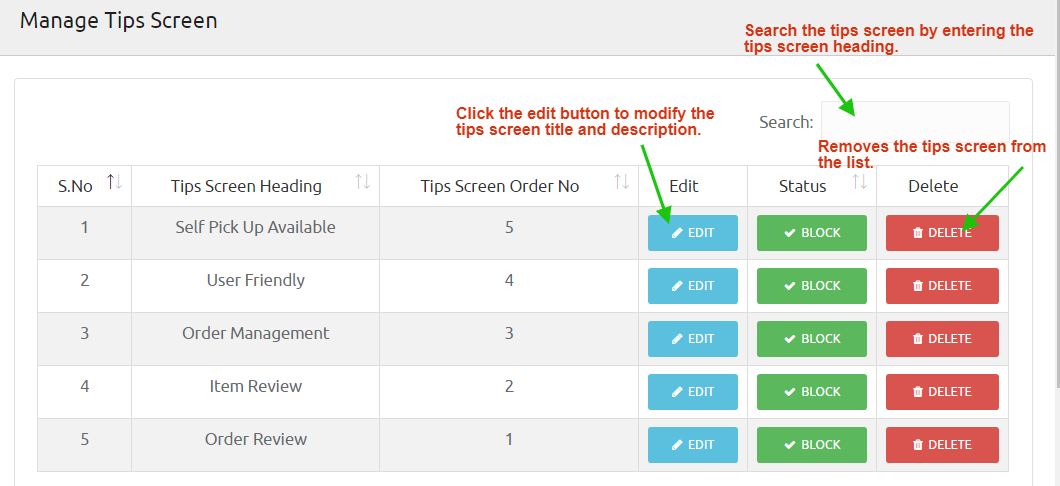
Manage Tips Screen It lists out tip screen heading along with the order of appearance of the tips. You can also search the tips by typing the tips title or the tips screen order no in the search box.
Operations
Edit - You can edit the details of the tips and click the update button redirects to the Manage tips page with a flash message updated successfully.
Block - Select the tips you wish to block by clicking the block button, which flashes a message Blocked successfully.
Unblock - You can add the blocked into the list by clicking the unblock button, which flashes a message unblock successfully.
Delete - Deletes the from the list.
Manage FAQ present in the left side panel. Press to expand, add a FAQ, and manage FAQ.
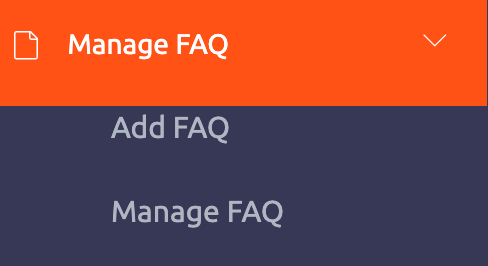
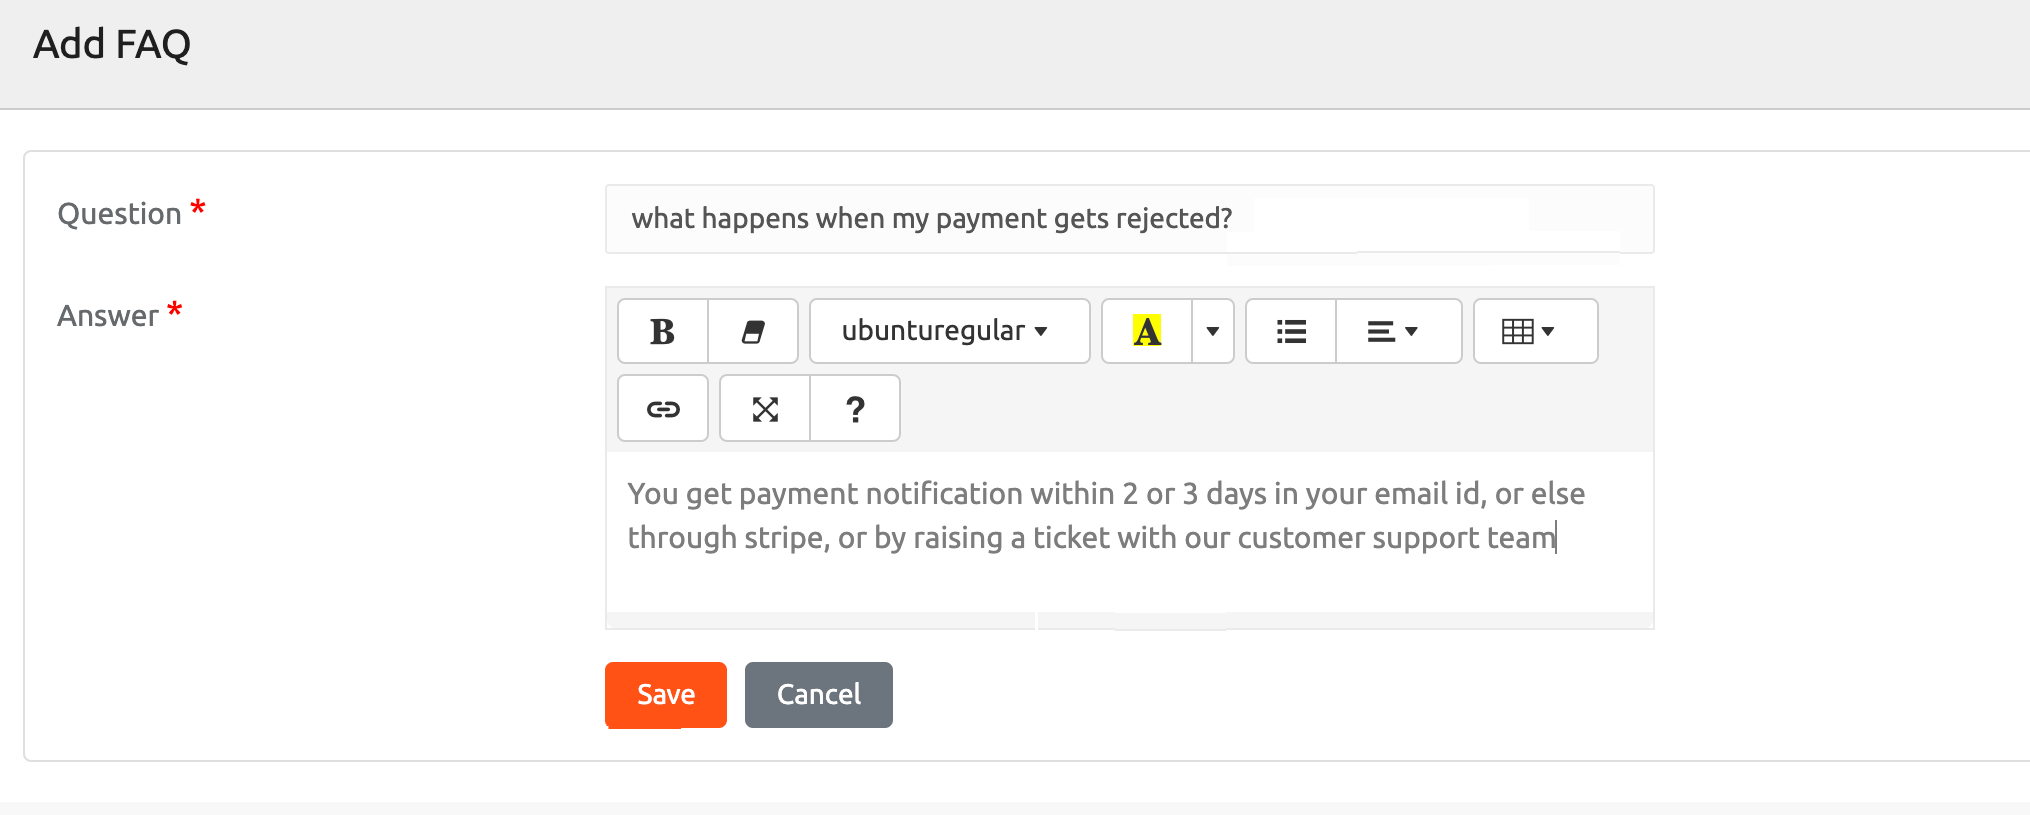
Add FAQ
Question - Type the FAQ question of your restaurant that helps to clear the doubts of the customer.
Answer - Specify the answer for the FAQ question. You can choose your desired font size, style, color, and other formatting options present at the top of the text box, then click the save button to save the Q & A.
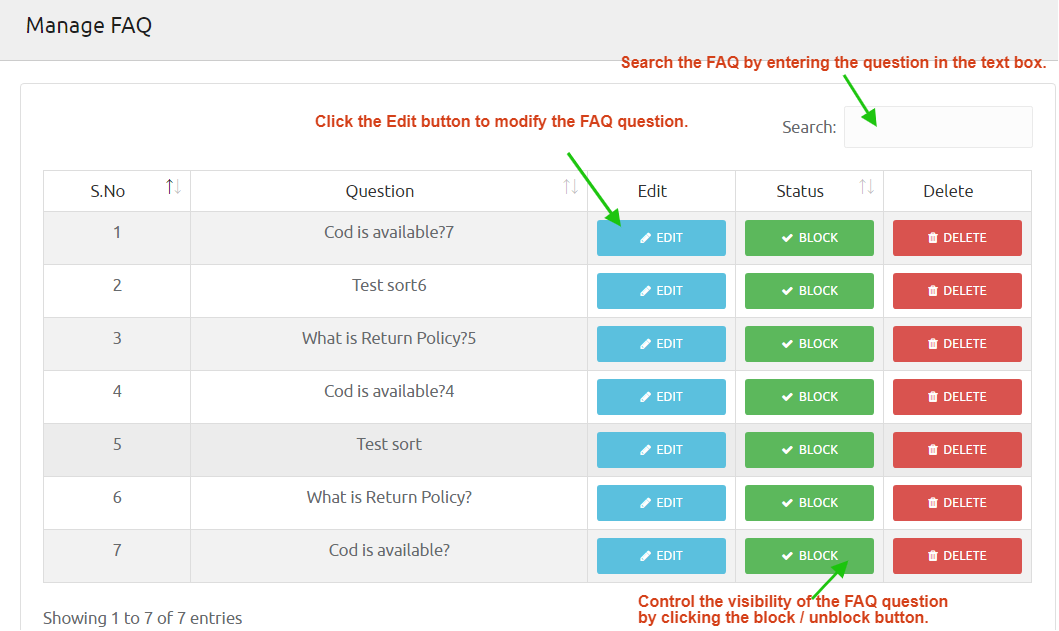
Manage FAQ It lists the FAQ questions of your restaurant. You can also search the FAQ by typing the FAQ terms of your restaurant used in the search box.
Operations
Edit - You can edit the FAQ details and click the update button redirects to the Manage FAQ page with a flash message updated successfully.
Block - Select the FAQ you wish to block by clicking the block button, which flashes a message Blocked successfully.
Unblock - You can add the blocked FAQ into the list by clicking the unblock button, which flashes a message unblock successfully.
Delete - Deletes the FAQ from the list.
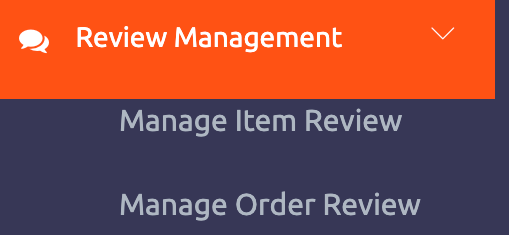
Manage item review present in the left side panel. Press to expand, manage item review and manage order review.
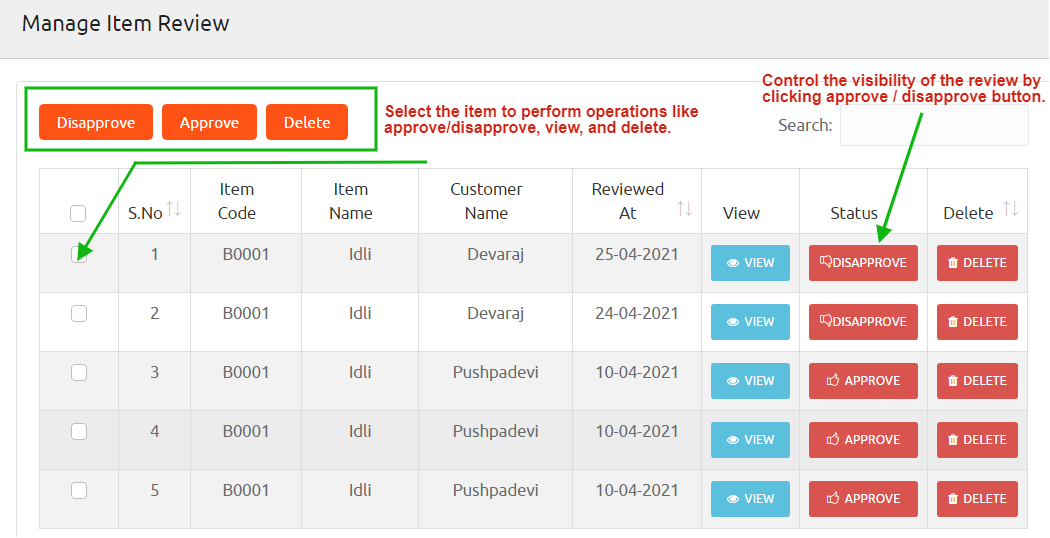
Manage Item Review This section gives the complete list of item code, item name, customer name, and reviewed date with few operations to approve/disapprove the customer comments.
Operations
Approve - Once you approve the review given by the customer, it is visible to the other users also with the flashing message of approval successfully.
Disapprove - If you disapprove of a customer review, then it cannot be viewed by any customer with the flashing message of disapproved successfully.
Delete - You can delete a customer review by clicking the delete button with a flash message of delete successfully.
View - Click the view button to check out the review comments and stars provided by the customer regarding your restaurant food.
This section displays the order review given by the customer with the values of the name of the delivery person, customer name, review date.
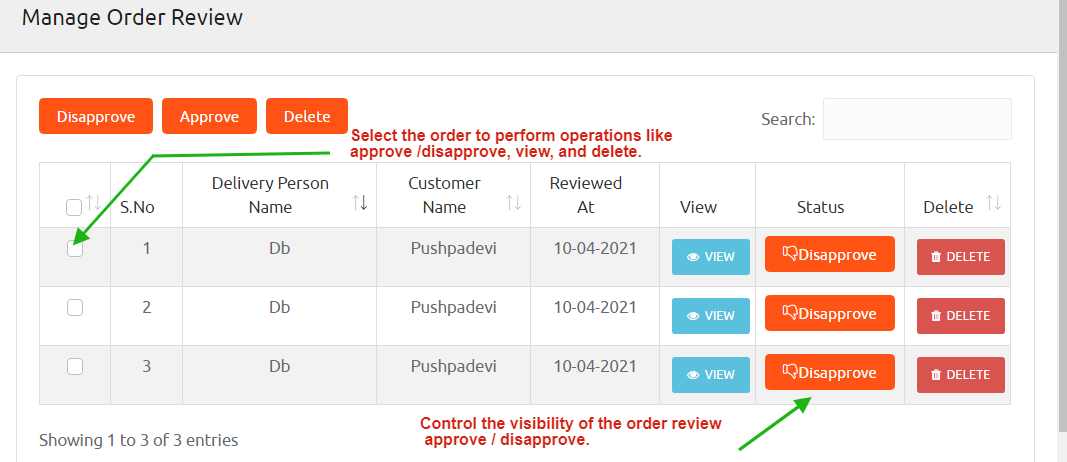
Click the view redirects to the view review page displaying the review comments, date, customer name, and ratings.
Operations
Approve - Once you approve the review given by the customer, it is visible to the other users also with the flashing message of approval successfully.
Disapprove - If you disapprove of a customer review, then it cannot be viewed by any customer with the flashing message of disapproved successfully.
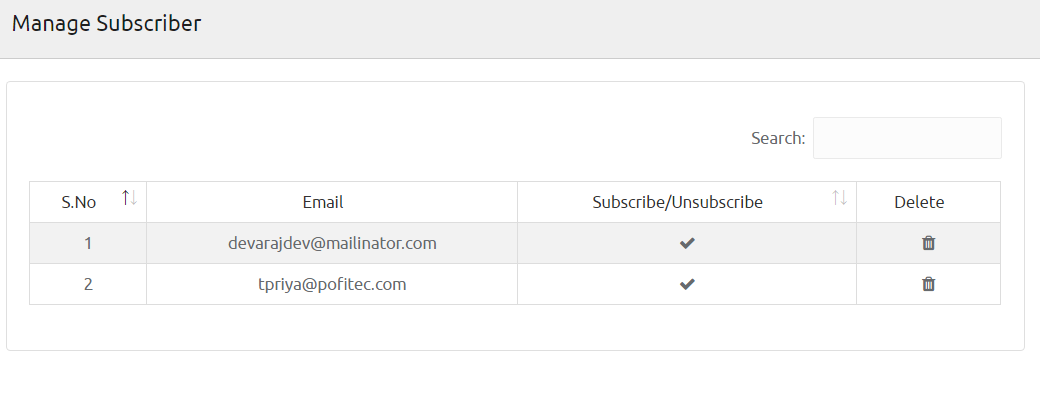
Manage Subscriber This section shows the customer email, whether the customer subscribed or not. You can even delete the customer by clicking the delete symbol on the page.
Send Newsletter
From Email - Specify the email address of the sender in the text field.
Email To - If you wish to send promotional offers to all users, select all users. If you want to transmit to a particular user, select the particular user. Else, you can choose the subscriber radio button for sending emails only for the subscribed users.
Subject - Input the email subject title stating your restaurant information.
Message - Enter the email message in the corresponding field and click send button to transmit the email to the customers.

